Browsing Category

Motherhood

Lifestyle Motherhood

35 Things My Kids Should Know About Me

35 things my kids should know about me

As my pregnancy advances and I begin to consider my future as a mother I find myself wondering how things will change. How I will change. What are some things my kids should know about me? Will I pull from the invisible well of strength that all mothers seem to have? Perhaps I’ll be guided by some sort of inner knowledge that will unravel and unlock as I need it most. But who will I be?

While considering very important things like if I’ll ever enjoy a cigarette and a glass of wine again I realized that it might be important to document some things my kids should know about me. Maybe when my kid reads it for the first time they’ll feel enlightened. Or maybe, much like a child, they’ll brush it off as lame. I don’t know and I don’t really care—that’s a thing about me.

  1. I’m terrified of spiders.
  2. I had to steal my high school diploma because of a mistaken late fee on a textbook I had returned.
  3. I change my mind a lot.
  4. Sometimes what I think and how I feel aren’t the same.
  5. I love the smell of black & mild cigars, they remind me of being a kid.
  6. I used to think people would find me more interesting if I liked what they liked. It turns out the opposite is true. Be the voice, not the echo.
  7. I’m still afraid of the dark.
  8. I wish I was closer to my mom.
  9. I’ve never felt stronger than when I was pushing my body in the gym and I’ve never felt more in tune with myself than when I was pregnant.
  10. Sometimes I don’t like who I am, I wish I was more tolerant and forgiving.
  11. I’ve never met a better person than your father. That’s why I married him and why I chose him to be your dad.
  12. I’m passionate about people, when someone needs help I will drop almost anything to figure it out.
  13. Once my underwear was showing while I was sitting in the cafeteria in 7th grade. I was sooo embarrassed. Now, I couldn’t even estimate the number of people I’ve mooned, your ideas will change.
  14. Nothing is better to me than a cup of coffee, a good book, and the rain.
  15. I hate it when people smack their mouth when they chew.
  16. For me, the hardest part of growing up was learning to handle being wrong and admitting it with dignity and grace. I’m still working on it and growing all the time.
  17. I wish I didn’t have stage fright. I would love to perform.
  18. Halloween is my favorite holiday, Christmas is a close second.
  19. I’ve thought I looked fat in every photo ever taken of me.
  20. I’m certain the earth is round.
  21. My favorite part of my body is my back, it’s strong and gives me the ability to do everything that I do.
  22. I wish I was better at outdoor stuff, I fantasize a bit about being a survivalist.
  23. I also fantasize about secretly being really good at martial arts.
  24. As a toddler, I used to tell people I lived at Target.
  25. This might not come as a surprise, but I’m very contrary and confrontational. Hopefully, you’ve learned a measured temper from your dad.
  26. I can barely snap my fingers. It’s one of my biggest shames.
  27. As a child, my favorite ice cream flavor was “green.” My parents would test the theory by giving me both pistachio and mint chip. I couldn’t tell the difference and loved them both.
  28. The first time something “blew my mind” was when I was six and I was informed I didn’t have to take off my dress to pee, I could just pull up the skirt.
  29. Han shot first
  30. Kid horror stories really fucked me up. I’m still afraid of something licking my hands or feet if I let them hang off the bed.
  31. I’ve marched against war and for human/ civil/ women’s/ gay rights whenever I could.
  32. I never could be told what to think or who to be. I hope you inherited that, though I’m sure I’ll regret saying that.
  33. At the time of your birth, I was able to express complex thoughts and emotions exclusively through the use of emojis and KIMOJIs. It’s vintage, look it up.
  34. I’m really good at doing anything with my hands and I enjoy handicrafts.
  35. I’m an animal lover through and through.

I’m sure one day there will be a follow-up post including a great deal more things my kids should know about me. What are some things your kids should know about you?

Lifestyle Motherhood

Family Life: Expectations VS Reality

Before the birth of your first child, how did you imagine life looking? Which expectations lined up with reality? If you’re honest, I’ll bet a fair amount threw you for a loop. This was definitely the case for me. Our family life expectations vs reality are sometimes two different worlds. Especially as a new parent.

You can’t know, in the months leading up to their arrival, who your child will actually be, and how you’ll actually respond to them. They are their own person, with preferences and opinions about the world you’ve spent hours cultivating specifically for them. Our babes do not always agree. Whether we like it or not.

In the nine months since my daughter was born, I’ve eaten my share of crow. Therefore, I write this to expose a glimpse into my truth. Whether you’ve been here and totally relate, are on the cusp of new parenthood, or (like I used to) enjoy a good laugh at parents’ expenses, behold my Family Life: Expectations VS Reality:


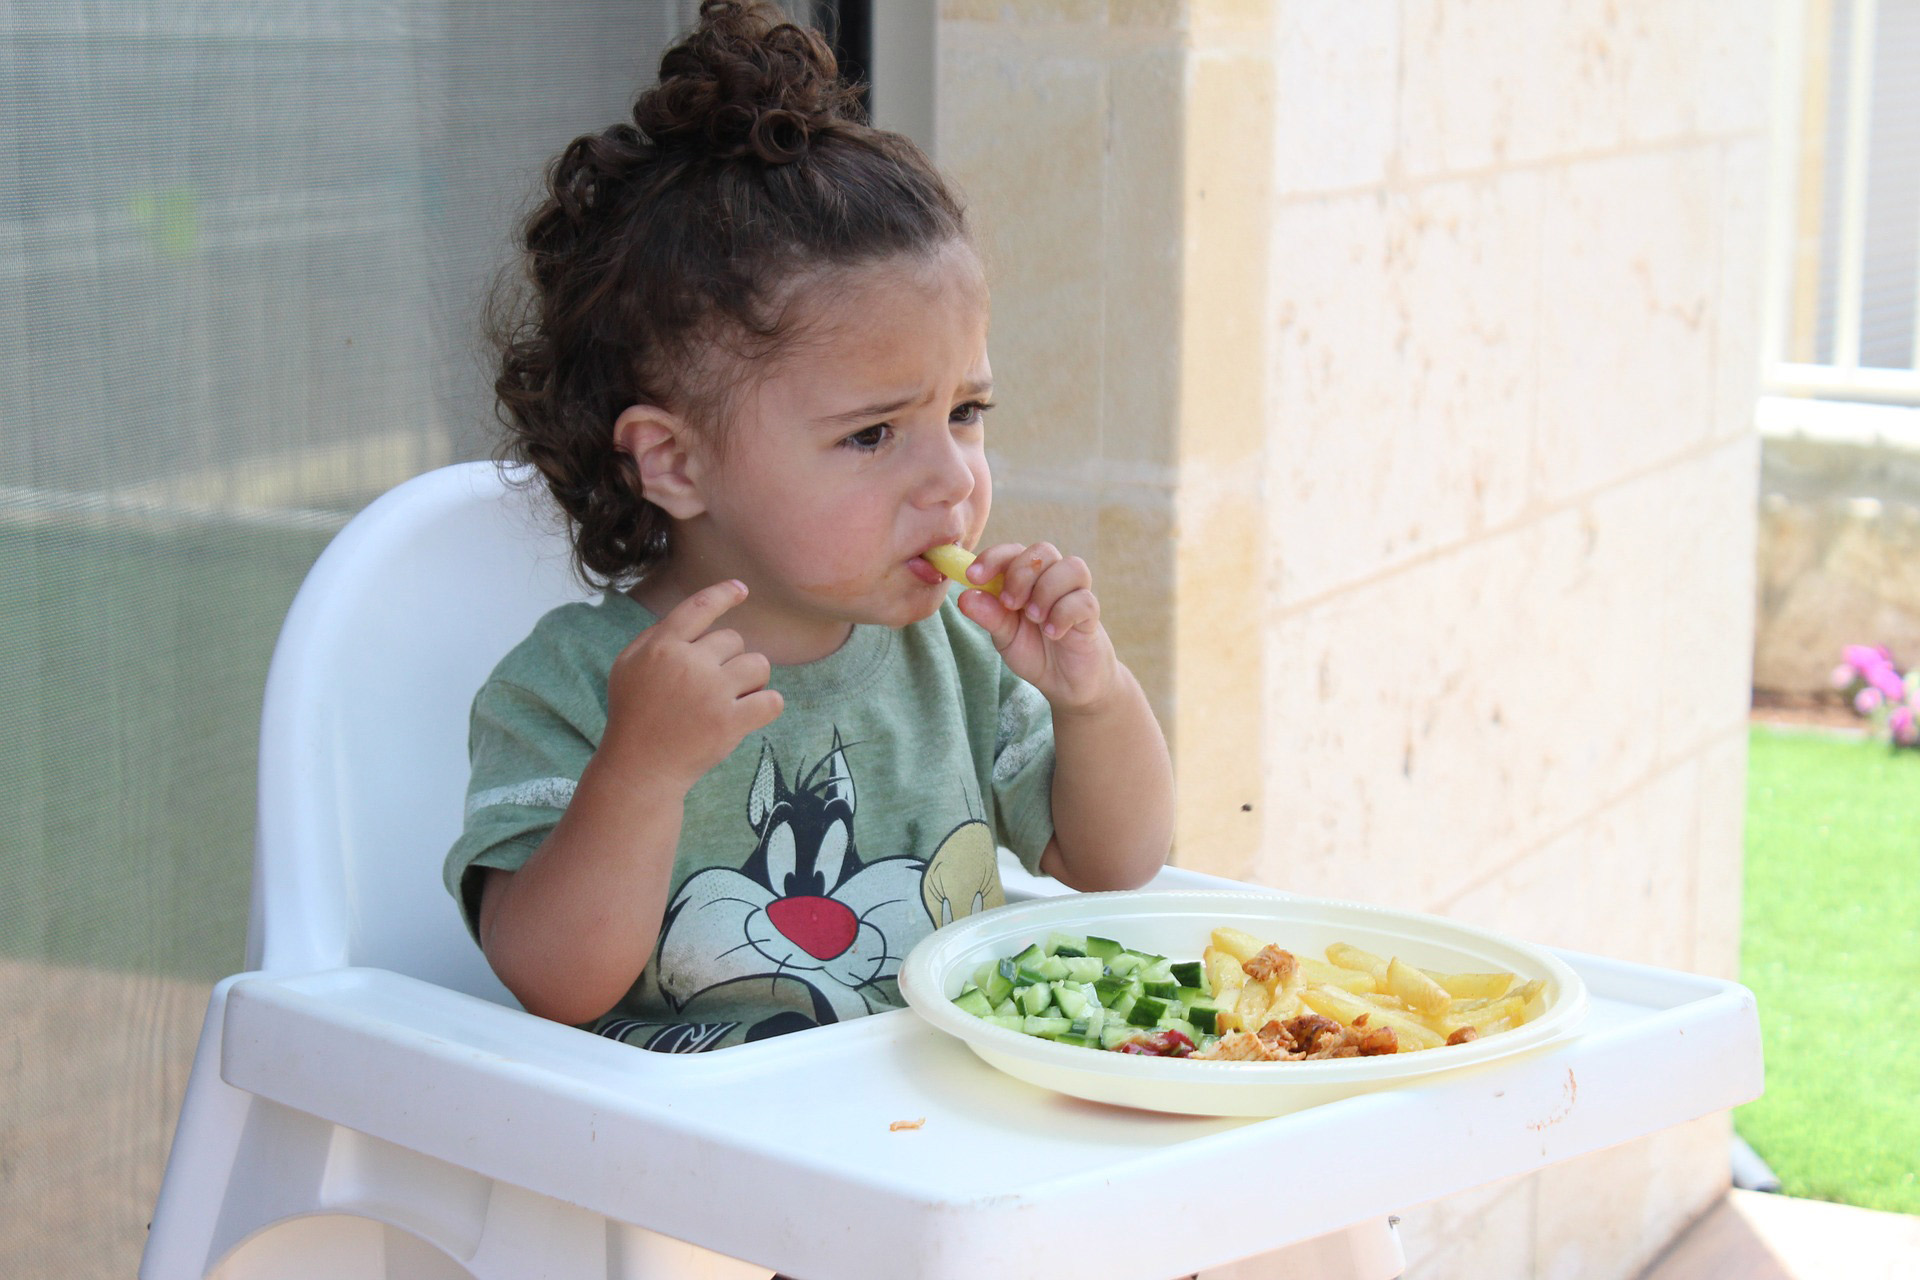
Expectation: My baby will eat only fresh/organic/no sugar/no additives/low sodium food, prepared with love, from scratch.

Reality: Who has time for that? Seriously? Parenting is a busy job, and sometimes, cubes of cheese is all my daughter will eat. At least she’s not hungry, right?

no vegetables expectations vs reality


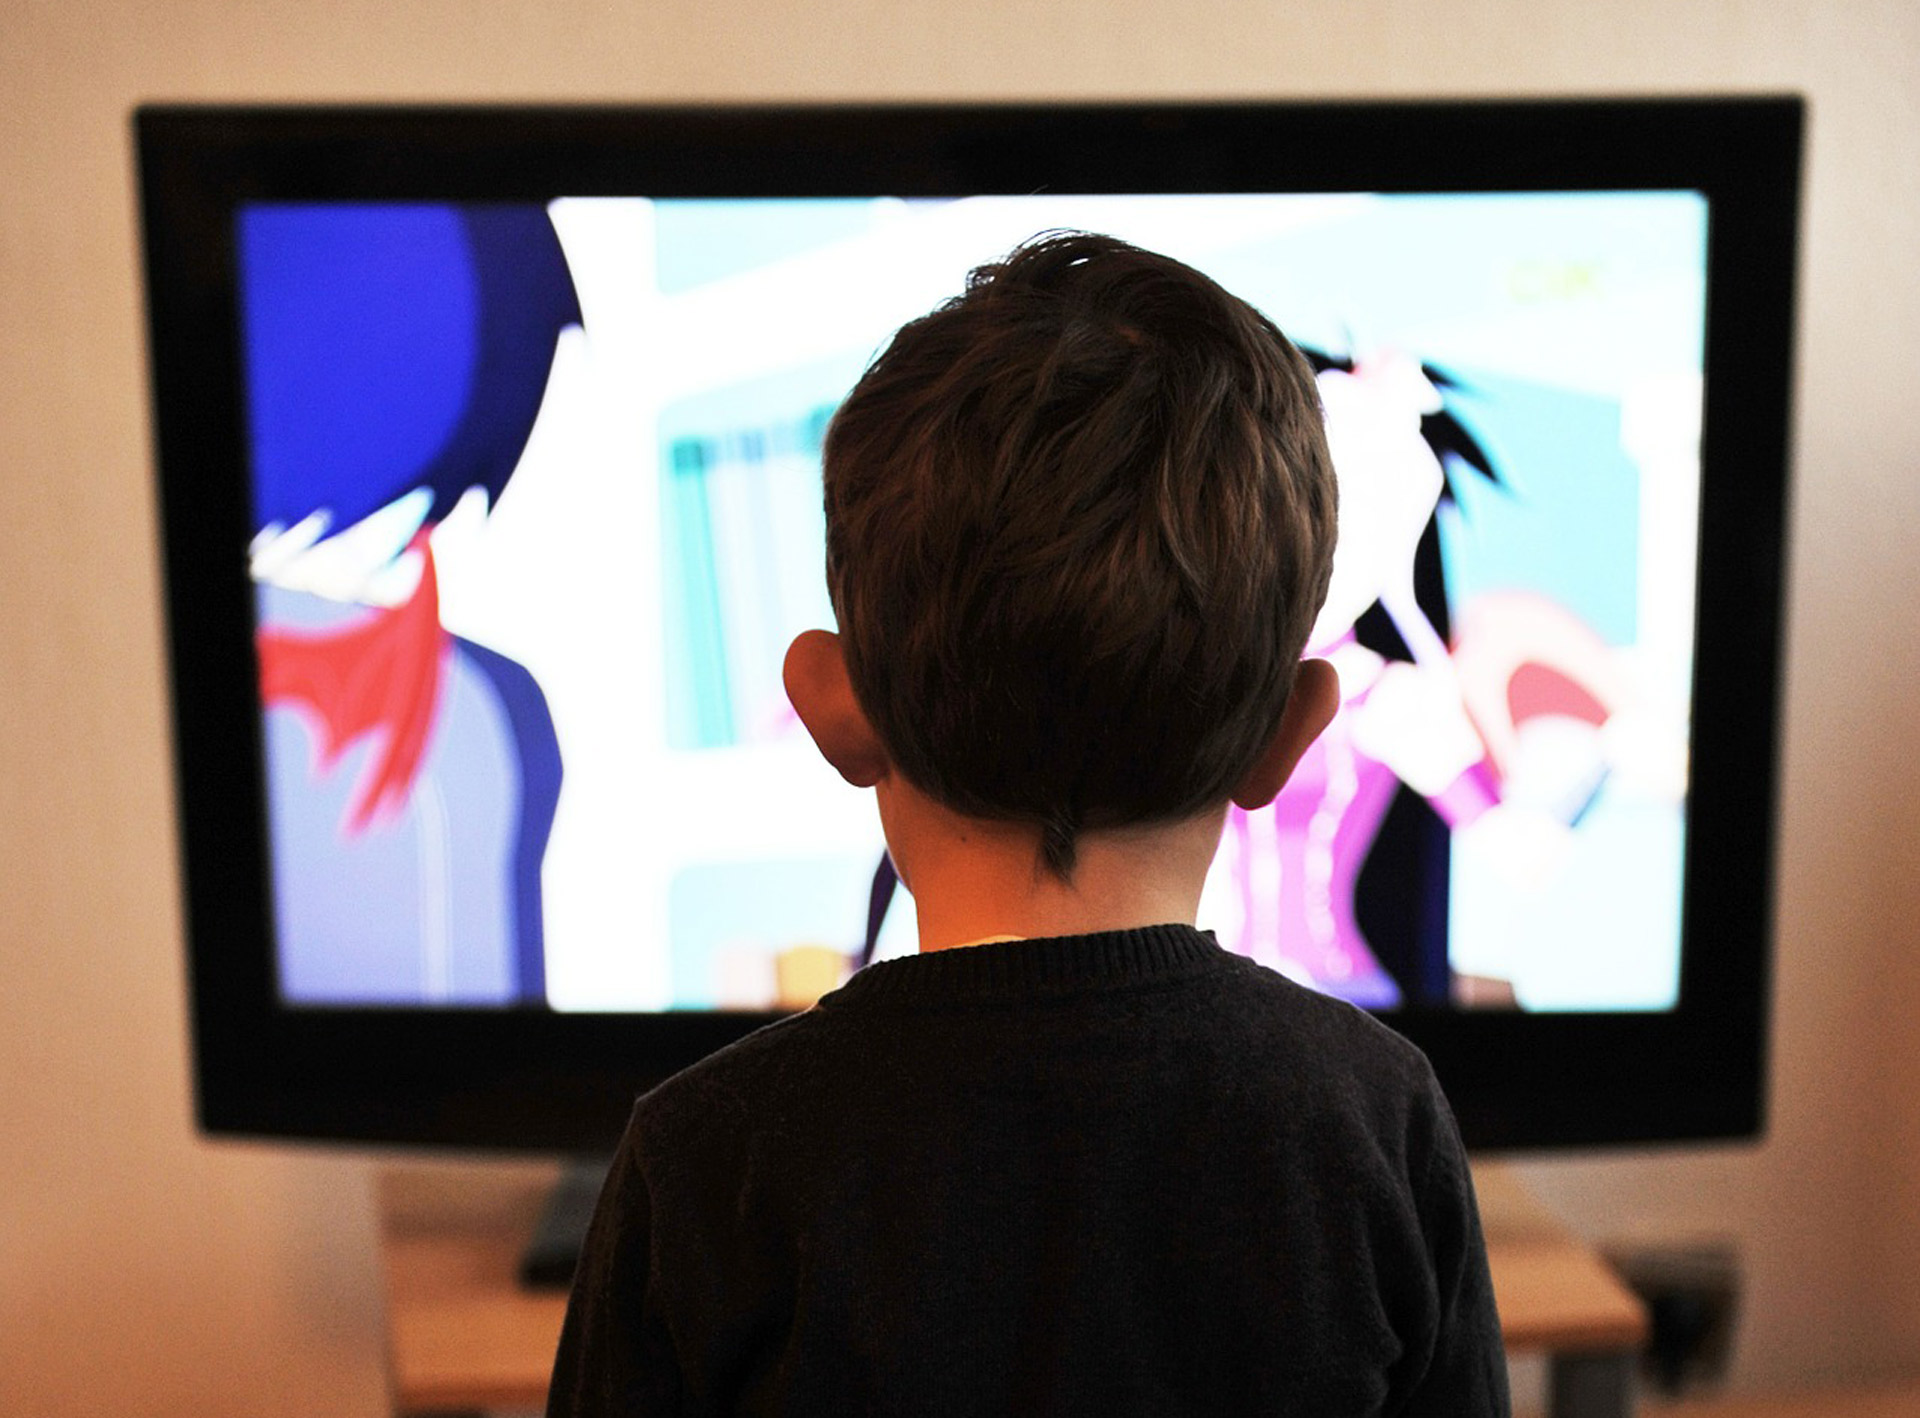
Expectation: No TV until they are at least 2 years old.

Reality: Sorry, not sorry. My daughter loves Sesame Street. Using Elmo and the gang as entertainment so I can eat/shower/clean/do laundry/pay bills/finally call my mom back/go to the bathroom solo, is a needed reprieve. I play and engage all throughout the day, but Mama needs a goddamn break.

no TV expectations vs reality


Expectation: Days will be occupied with reading and educational toys.

Reality: I dreamed up BIG expectations about play time. We built our daughter a little library, sectioned out toys based on her age. Turns out, she could not care less about reading. In fact, books seem to annoy her. And the favorite “toys” are TV remotes and a set of plastic measuring cups. Not sure what exactly those teach, other than “this goes pretty far back in my mouth.”

childs library expectations vs reality


Expectation: I will not raise my voice at my kid.

Reality: I think children are born with an uncanny ability to test your patience. Occasionally, I react loudly. I lose my temper because I need her to “just give me a fucking break.” I’m human. To be fair, sometimes I raise my voice for safety. But more than likely, I’m saying “no,” which is my daughter’s least favorite word.

parent losing cool expectations vs reality


Expectation: We’ll create a magical nighttime routine to help baby wind down and sleep through the night.

Reality: Bath time, reading, singing songs, all the typical sleepy time routines, rile up my daughter. “Oh, these silly parents. I see where they are going with this, but I WILL FIGHT. YOU CANNOT NOT CONTROL ME. Also, I plan on waking at least every two hours all night long, so best of luck.”

crying baby expectations vs reality


Expectation: I’ll be a cool parent.

Reality: My baby is too young for me to embarrass her just yet. But wearing sweatpants in public in your 30s is cool, right? And “Baby on Board” signs? What about memorizing the PBS kid’s show songs?

cool mom expectations vs reality


Expectation: Instagram Parenting.

Reality: Whatever social media teaches us about what parenting looks like, the reality is definitely not perfect. Life isn’t one big photoshoot (though photoshoots with my baby are the most fun). I enjoy posting sweet moments, milestones, and funny glimpses into our life. That being said, I’m for sure not pulling out the camera when I’m covered in shit or my daughter is losing her mind because “no you can’t have that, its not for babies.”

fit expectations vs reality


Expectation: My house will stay clean and organized.

Reality: Sometimes. This is only sometimes true.

organized house expectations vs reality


Expectation: I will take time for myself.

Reality: My personal time is napping with my daughter (or laying down with her when she falls asleep and rewatching “Parks and Recreation” because it’s the greatest show). Driving the long route home from the grocery store to hear the end of that song I love. Reading instead of tackling the dirty dish pile. Personal time is about taking care of yourself, however you define it.

me time expectations vs reality


Expectation: I will love my child.

Reality: The love is beyond measurement.

love expectations vs reality

At the end of the day, parenting requires flexibility. Going with the flow, and whatnot. Family life is surprising, glorious, messy, and unpredictable. Laugh off what you can because it’s the most beautiful experiment in which you don’t know all the rules. Embrace the chaos. Learn to love reality not meeting your expectations because family life is so much better than what you imagined.

Lifestyle Motherhood Recipe

Beginner’s Guide: Simple Cooking Tips from One New Mom’s Kitchen to Yours

Domestic life. I’m a super-newbie to it. I’ve been married nearly two years and my daughter is 6 months old. I didn’t grow up in the kitchen, and never saw my future self with a kid. But here I am; a stay at home mom who loves making food for her family. Today, I bring you a little something I’ve learned: five simple simple cooking tips for us new moms. 

I’m not claiming to be any sort of connoisseur. My food knowledge is still pretty basic. However, I figure I cant be the only former “definitely never getting married or having kids, so who cares if can cook or not” lady out there. While my rockstar of a husband goes out in the world to bring home the bacon, I’ve learned easy and interesting ways to fry it up (not really, I gave up meat, but thats for another day). In this post, I’m sharing my two cents to keep meals healthier and efficient, and to help other newbies feel a little more confident in their kitchen.

Without further ado…

TIP #1 : VEGETABLES!
simple cooking tips

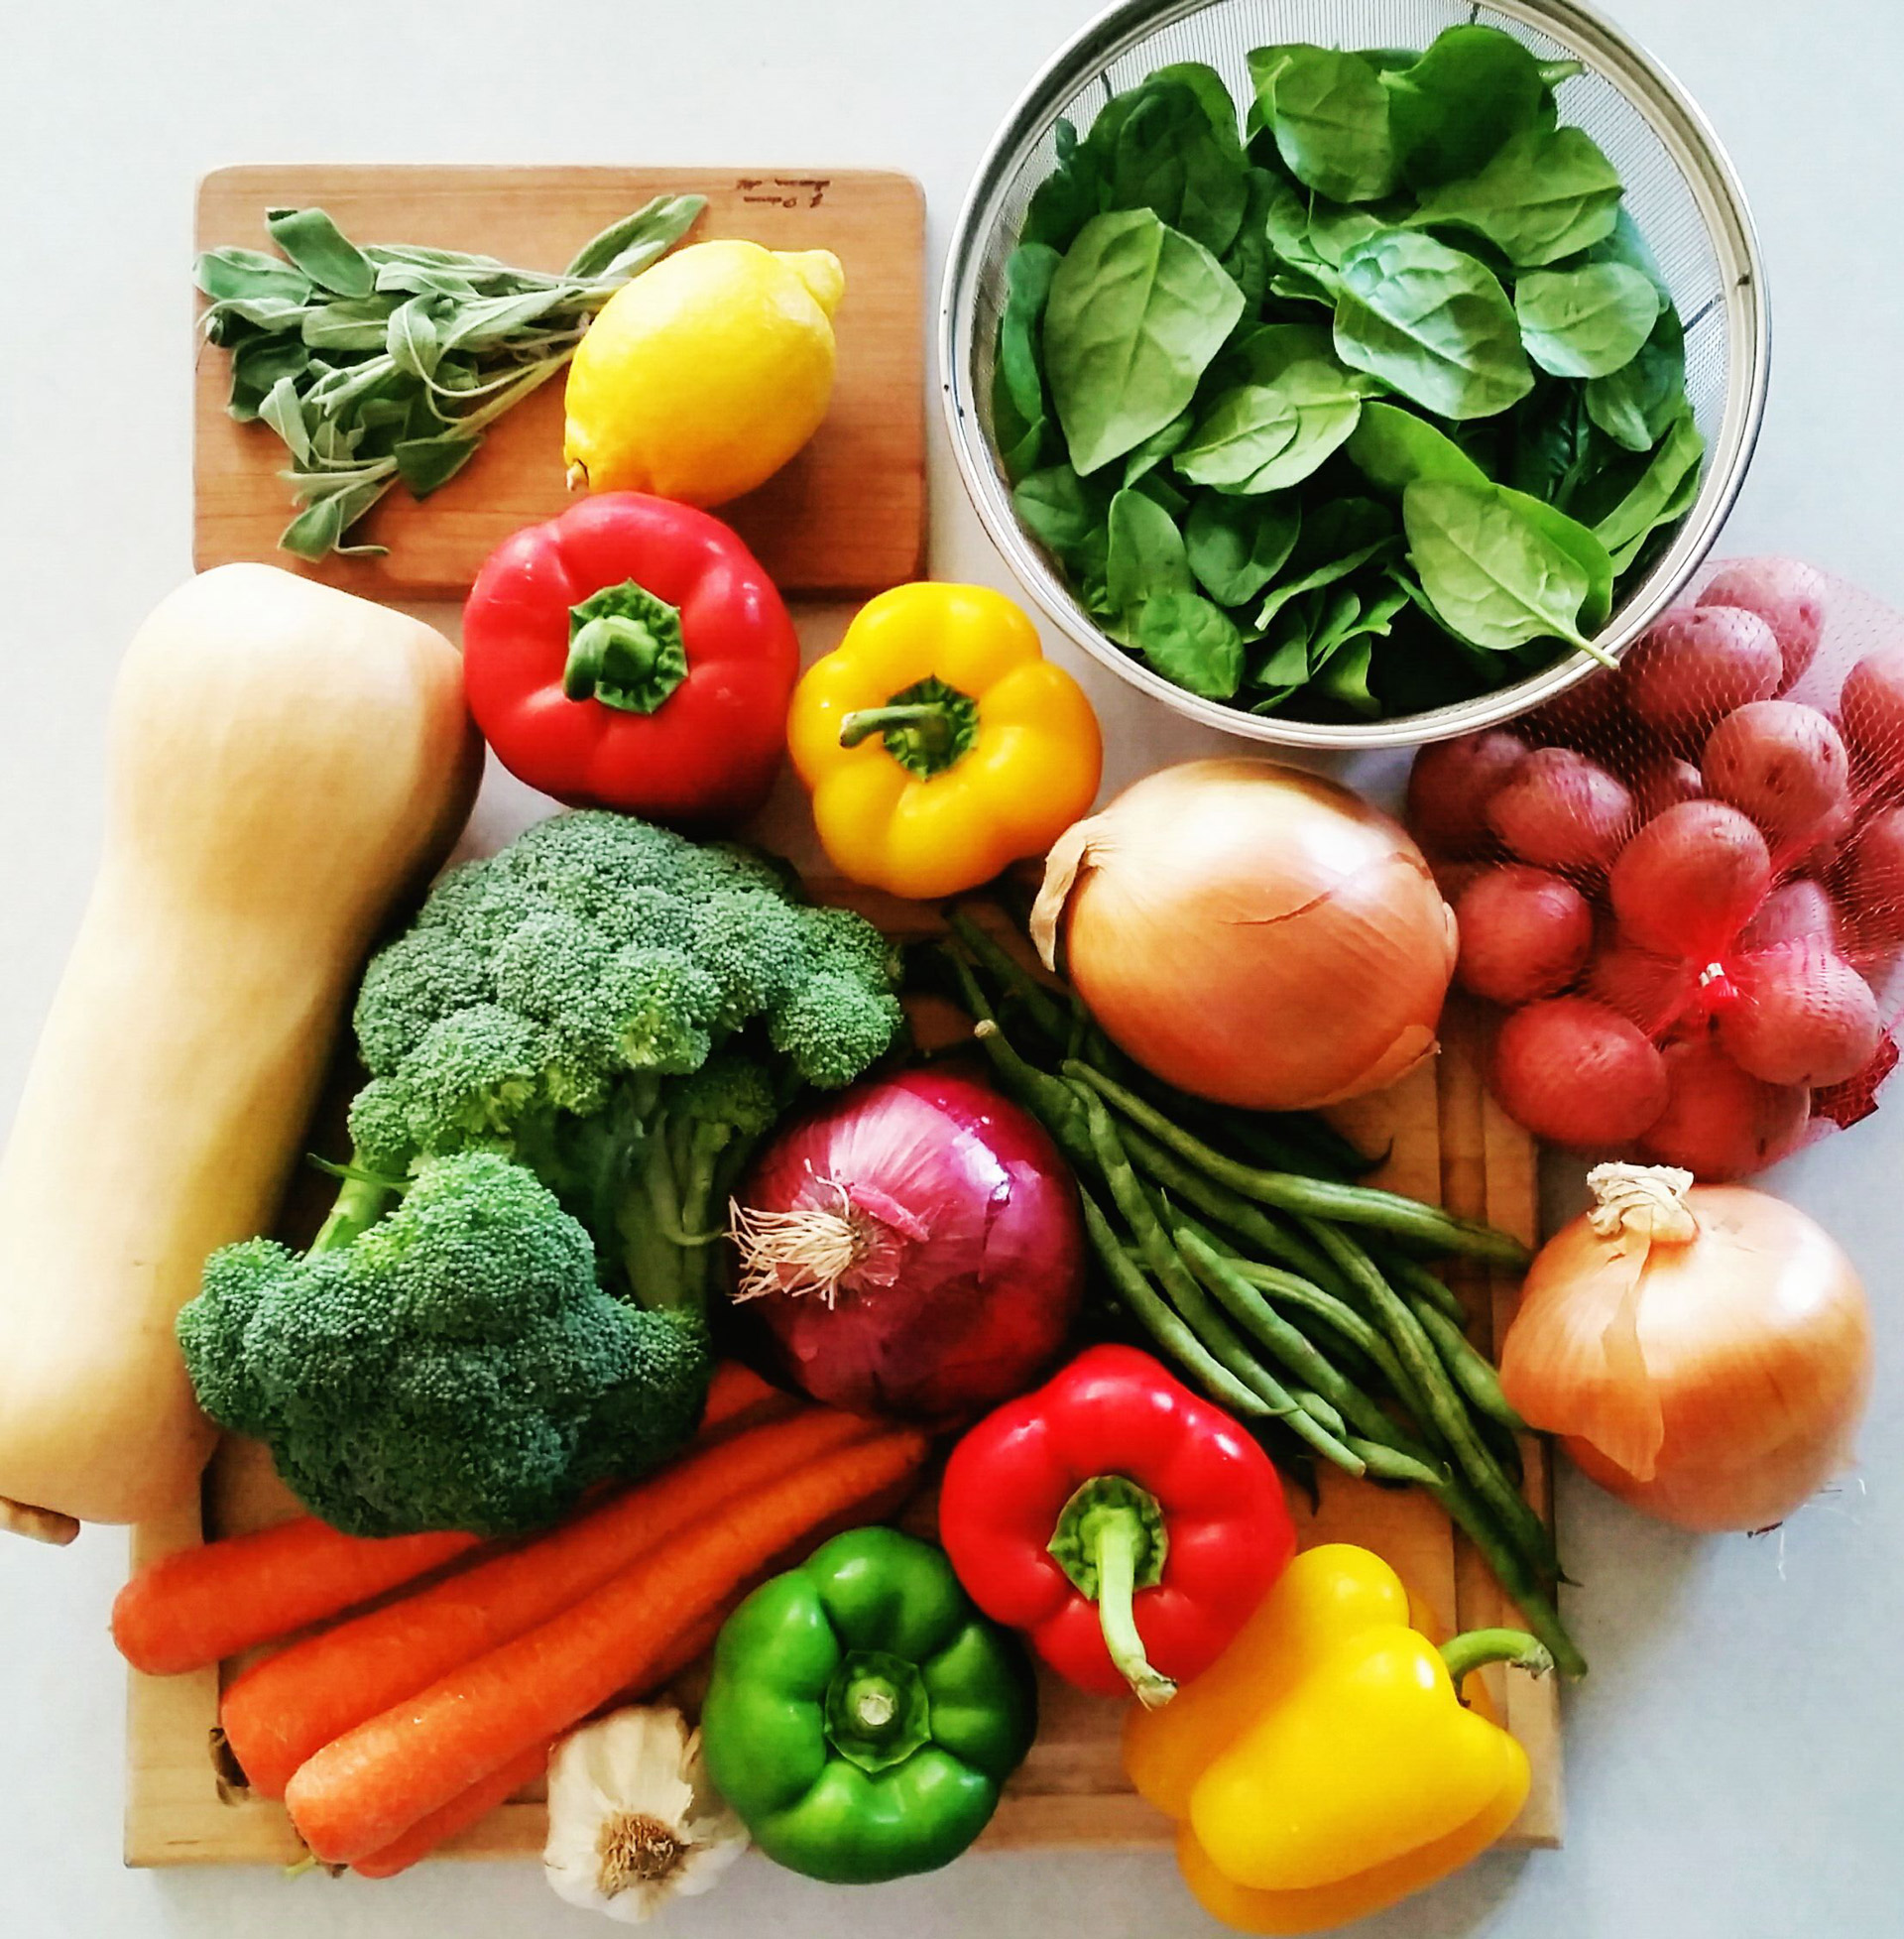
Arguably the most important of my simple cooking tips. This is the veggie haul I brought home from my weekly grocery trip (although to be honest, I’m often there more than once a week). I’ll use all these vegetables in the meals over the next five days. I’m a big fan of plants because they are so healthy for all three of us. Our doctor’s philosophy is “If it’s a plant, its great.” Or something along those lines. Anyway, one of the really great things about vegetables, is how quickly you can prepare them – it can take as little as 10 -15 minutes depending on  your method.simple cooking tips

  • Above, I prepared steamed vegetables two ways: left are plain, washed and cut green beans and carrots (also peeled), and right: a couple lemon slices placed atop, and sprinkled dried oregano to change up the flavor. 2 minutes prep, 10 minutes active cooking time.
  • Share your veggies with your baby once they are at the age to eat solids. You can purée or cook enough to soften for self feeding.
  • Large salads are a fantastic way for mom and dad to up their vegetable intake, and are generally quick to prepare. Throw in some beans (we’re especially fond of garbanzo) or nuts for added protein, sans meat.
  • Make sure your vegetable lot is colorful to ensure your whole family is consuming a variety of nutrients and vitamins!

TIP #2: CROCK POT/ONE POT MEALS

Crock pot Vegetarian Chili

simple cooking tips

One of the really great things about using a slow cooker, is how little effort you need to put in. As simple cooking tips go, nothing beats an easy meal that tastes great. With a crockpot, once you have all the fixings, you throw it in, and leave it. I can park my daughter in her high chair to hang with me in the kitchen, and usually the prep work takes about 15-20 minutes. This chili cooks at least 6 hours, but preferably 8 hours set on low, so all the flavors settle together. Above is this tasty chili I came across. I’ve changed a couple ingredients to suit it better to our tastes:

  • I leave out the turkey, although when I first found this recipe we kept it in – yummy both ways!
  • I soak the beans myself. This saves on cost and cuts down the added preservatives of beans in the can (eventually I’ll use fresh tomatoes for the base as well). With a slow cooker, theoretically you don’t need to soak the beans, you can throw them in dried; but I found the beans were still a little too firm. 
  • To take out some of the spice, because I’m breastfeeding, I replaced the chili powder with paprika and the jalapeño with 1 small can of mild green peppers.
  • Add garlic powder. I also double down on the spices because I find recipes are always too modest with flavor.

Sidebar: I was in a hurry to take pictures of my prep while my daughter was sleeping, and didn’t pay close enough attention to the spices. I accidentally used cinnamon instead of cumin (lolzzz). I just added another doubling of the CORRECT spices and it tasted great. Maybe it will be my “secret” ingredient. Mistakes are learning experiences!

One-Pot Risotto
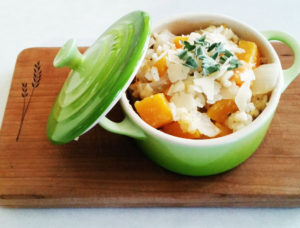
simple cooking tips

This one-pot butternut squash risotto has become a fan favorite in our house. Its a bit time consuming, so this is definitely a meal I cook when my husband is home so he can hang with the baby. Simple cooking tips aren’t always about total time/effort, but overall efficiency. What’s nice about larger dishes is using the uneaten amount as a side later in the week. More work one day, makes less work the next. Just reheat in the oven (at 250 degrees for about 45 minutes). Plus, with one pot meals, less clean up!


The recipe says it serves 4, but consider those liberal servings. One way to get ideas to tailor dishes to your taste, go through the comment section in online recipes. Then, trial and error. Figure out what you like about the meal, and what you don’t.

  • Used olive oil instead of butter
  • Added a medium sized yellow onion which I throw in same time as the squash.
  • Let the squash cook about 10-15 minutes longer to soften it up more than original recipe calls for.
  • Vegetable stock instead of chicken to make vegetarian friendly.
  • Double the amount of sage.

TIP #3: MEAL PLAN 

My simple cooking tips are designed to make life easier, and new moms love that (or at least, I do). When you’re a newbie, it may seem hard to meal plan. “What do I cook, when I’m not very experienced?” Start off with things you already love, and know how to make. Then, you can start building your personal recipe book. I try to prepare one new recipe a week, so I don’t exhaust meals in my rotation. This also teaches me new skills. Practice makes perfect, after all.

simple cooking tips

I’ve learned to use an ingredient one recipe calls for again in another meal. Utilize what you have. An easy way to do that is with garnishes, herbs, and spices (See TIP #4). On Monday, I made this delicious salmon (download the recipe card here). One of the sides prepared for this meal was the steamed vegetables from Tip #1; the extra lemon from topping the salmon, I added to the steaming pot. I used one bunch of sage from the butternut squash risotto on the salmon as well. This helped me use up more of the fresh herb and not let it go to waste. Since I knew I needed something specific for one meal in the week, I planned another meal to use the same ingredients. Meal planning for the win!

TIP #4: INVEST IN SPICES
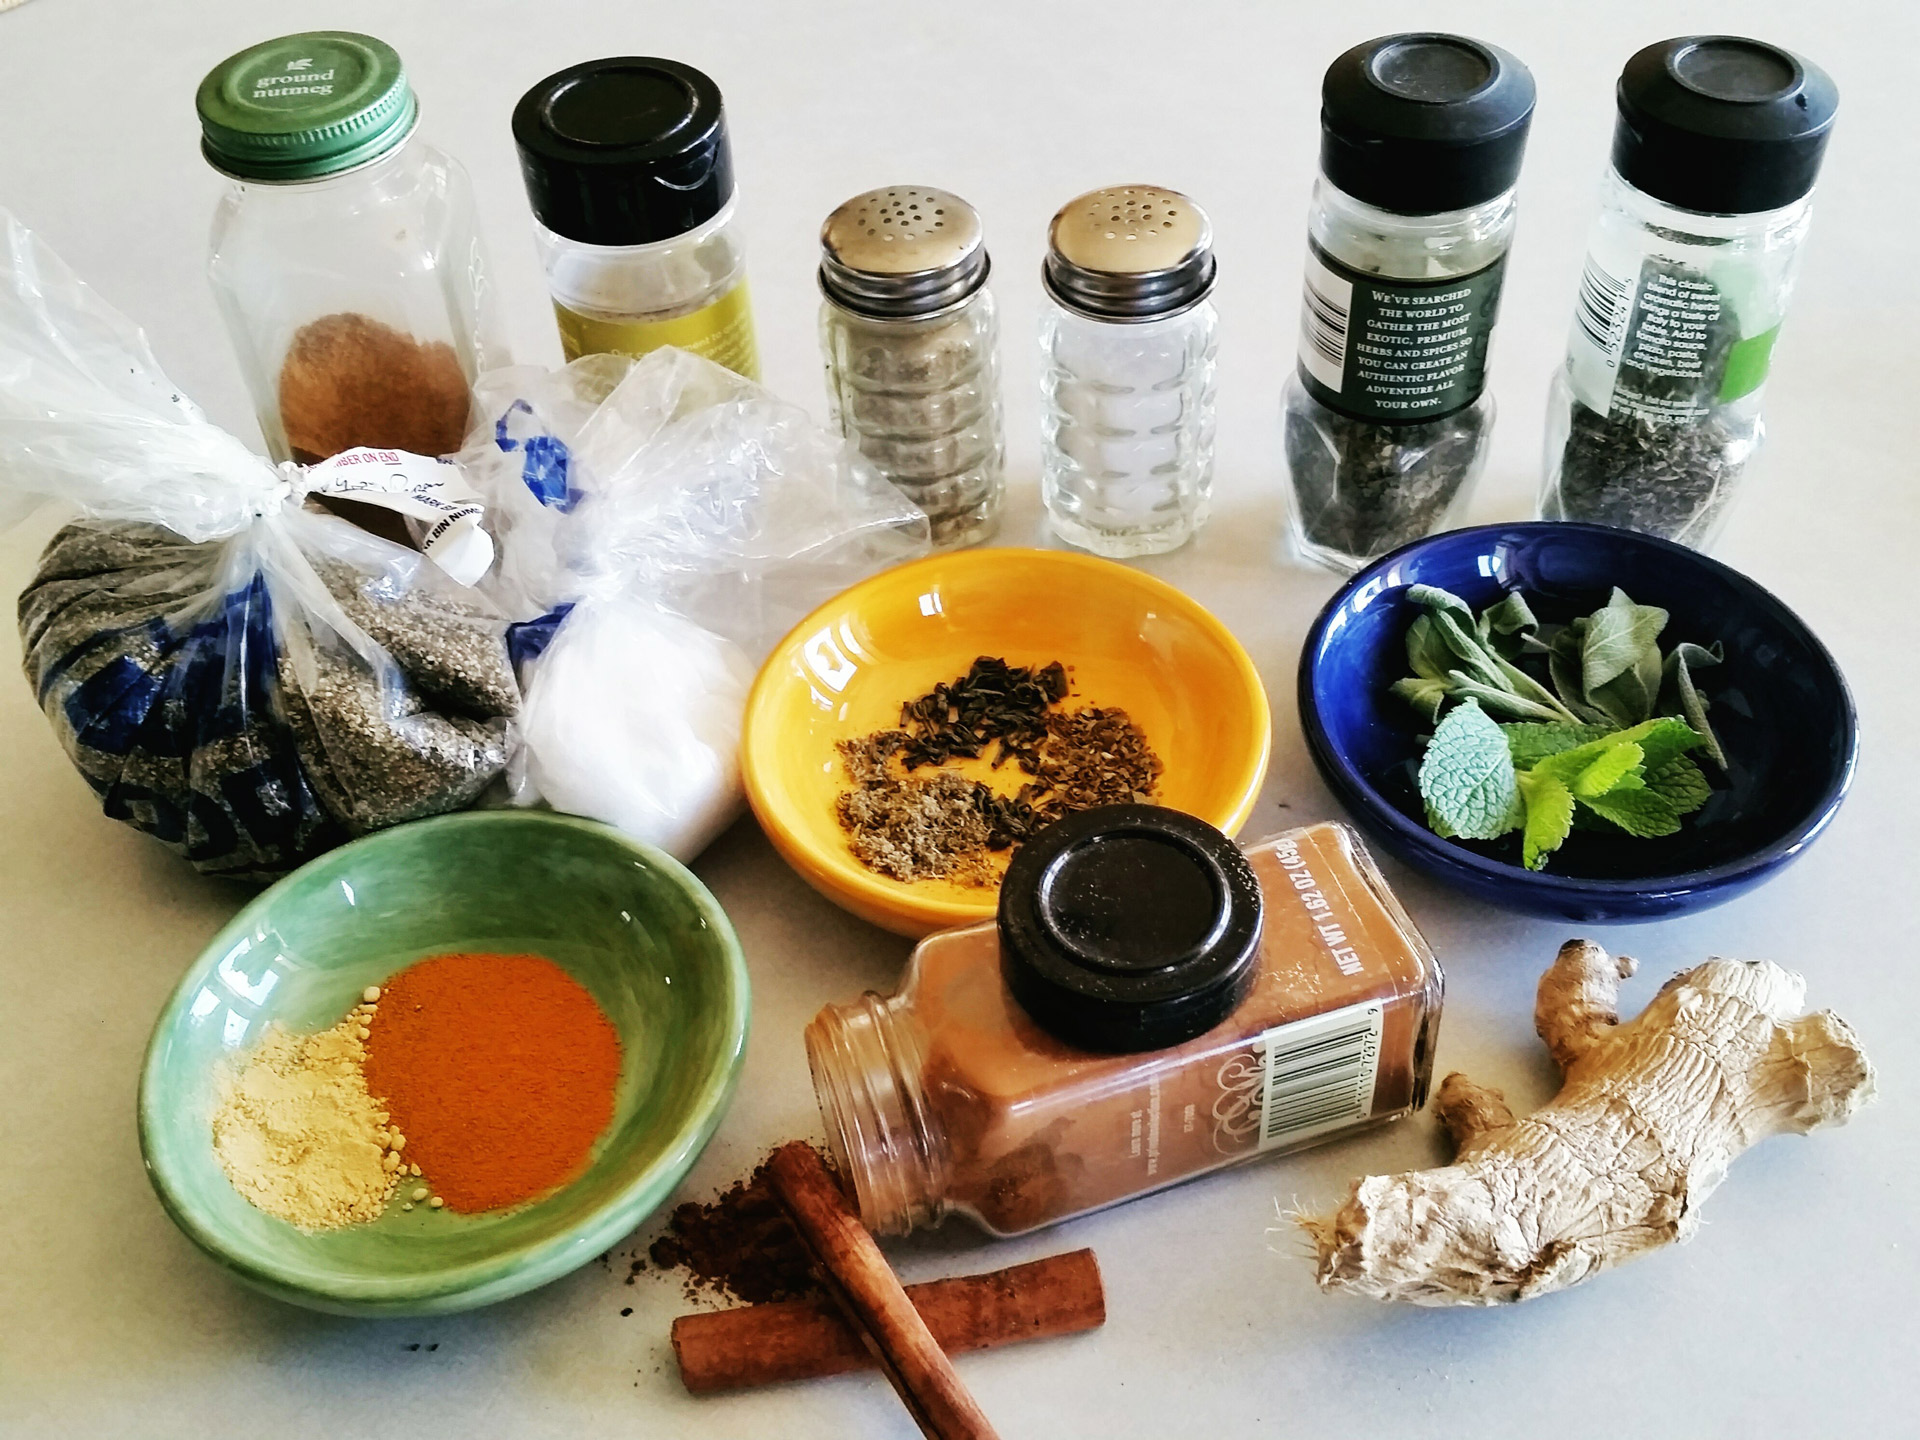
simple cooking tips

Investing in a spice rack is the beginner’s best friend of simple cooking tips. Depending on what staples you start with, the upfront money shouldn’t be terribly expensive. What you spend first, you save later because dried herbs and spices will go a long way; they can be just as potent a year after opening (you can check freshness by how strongly they still smell). Reduced sodium is another benefit because you won’t need added salt to make your food pop. 

  • Off the bat, dried oregano is an herb to start using. I add it to pretty much everything.
  • In place of chili powder, I use paprika and cumin for flavor. I miss spicy food (Sriracha forgive me), but its not great for my daughter’s sensitive stomach.
  • Garlic powder is great when you don’t have the time to prepare garlic cloves. 
  • Usually, the ratio for dried herbs to fresh is 1:3 (1 teaspoon of dried herbs to 3 teaspoons of fresh).
  • Add dried herbs toward the start of cooking to allow their flavor enough time to open up.

TIP #5: FIGURE OUT YOUR STAPLES  

simple cooking tips

Everyone should get to know their pantry/fridge staples. In general, I’m not a huge fan of grocery shopping. So, when life gets too hectic, this is when simple cooking tips really come in handy. Having go-to items each grocery trip makes the event quick, with less stress. Then on nights I’m not sure what to make, or the day gets away from me, I can whip up a simple one-pot dish by throwing anything I have on hand together (recipe card bottom of post), or use a tried-and-true recipe I (now) know by heart. Usually I’m able to lightly experiment by using a different spice, vegetable, or whatever else I have at my disposal. 

THE MORAL OF MY STORY

My simple cooking tips stem from “aha!” moments in the kitchen. For new moms venturing into cooking, the experience can seem daunting. Jump in, and you’ll soon realize just how easy it can be to learn. Now, I don’t have toddlers or a big family I cook for every night. That’s my eventual goal. Practicing now, ideally, will help me prepare for my first solo Thanksgiving or a random weeknight with many mouths to feed. Like I said at the top, I’m new to all this, but I’ve loved learning, and especially impressing my husband. 

I am generally on my own with an infant while feeding myself during the day, so smoothies and yogurt bowls are a fast, tasty way to add nutrition. There are so many variations of flavors, so mix it up throughout your week. I like to add a handful of spinach to my smoothies for an extra boost of those leafy green vitamins. 

Whether you’re new like me, or a veteran in the kitchen, preparing healthy meals to feed you and your family is necessary for positive energy, in both body and spirit. When we cut down on processed foods, and engage with what we eat, we’re more mindful of what we consume. Never quit eating pizza, eat an apple a day to keep the doctor away, and put love into everything you make.

Happy Cooking! 

What do you think? Are any of these tips helpful? What suggestions can you add to my simple cooking tips?
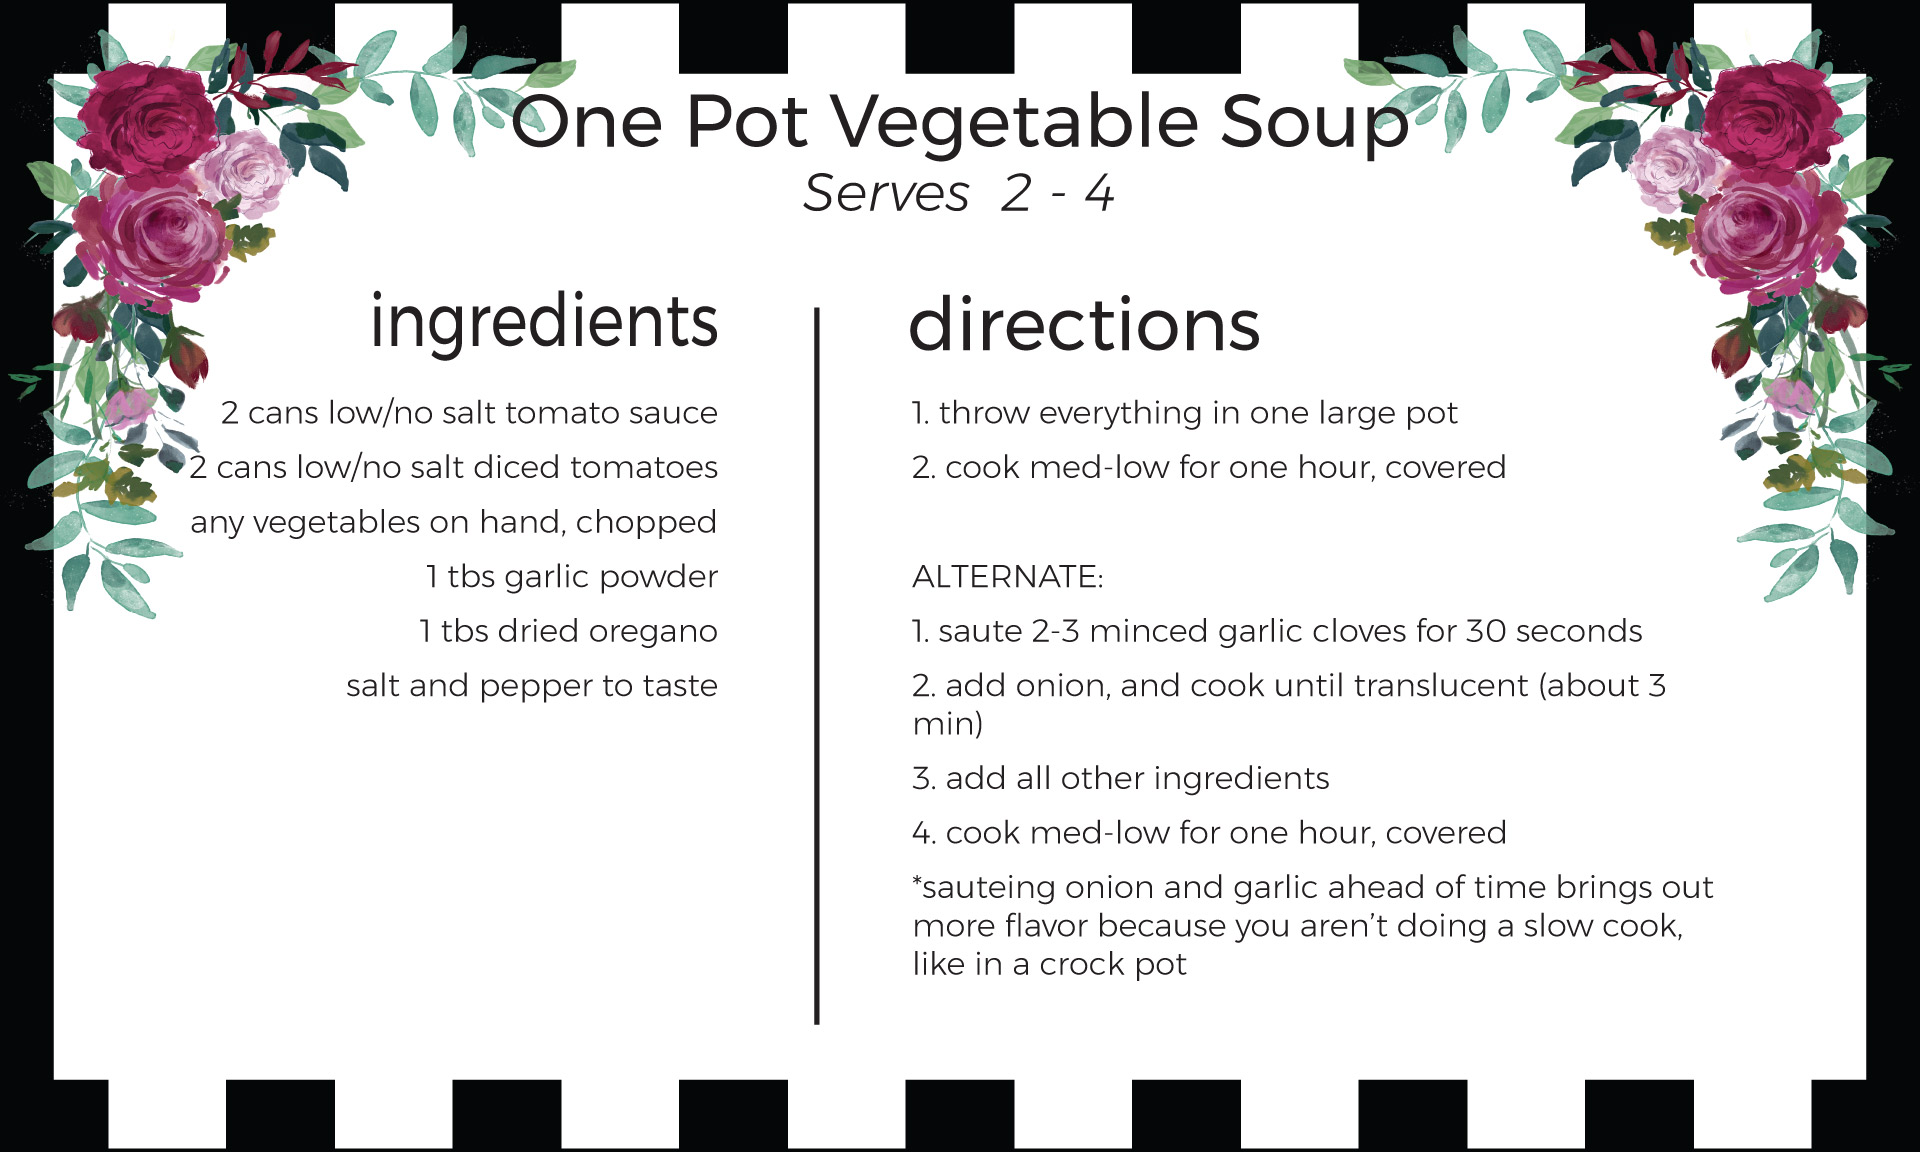
 

simple cooking tips

Click the image to download and print the recipe card!
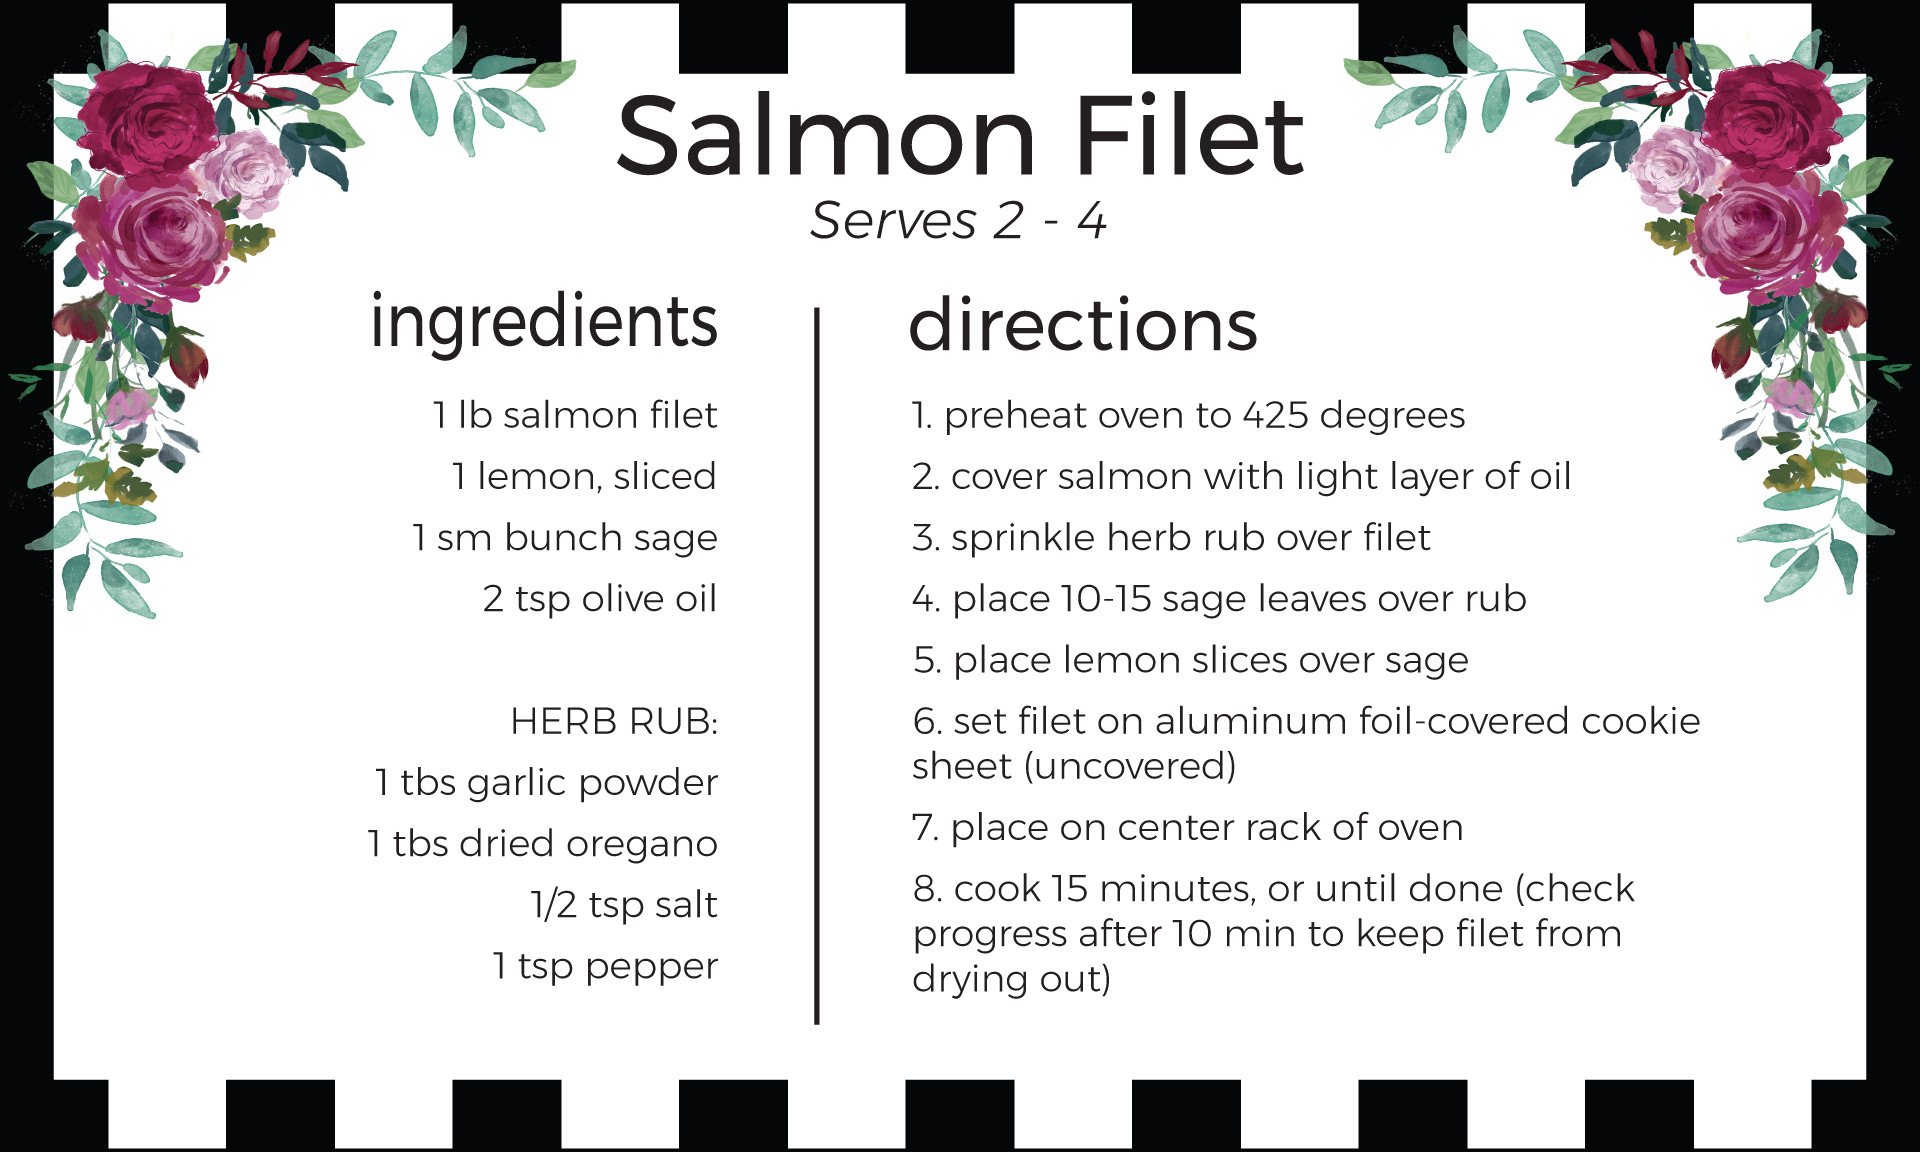
 

simple cooking tips

Click the image to download and print the recipe card!


DIY Lifestyle Motherhood

Building a Nursery: How I Saved on Cost and Space

Building a Nursery

What do babies need? I asked this as my husband and I set upon preparing and building a nursery for our first child.

Car seat, definitely. A crib? Or basinet? The nursery is small. Oh, it turns out we both want to share a bed with the baby, that solves it. High chair, but not for a while, right? When do we start solid food, again? What about a changing table? I think they are unnecessary; he likes the idea of a diaper station. Bottles, pacifiers, toys, socks. We need to get socks.

So, I began compiling lists. You might not think it, but babies need a lot of stuff. Or so we’re told by advertisements and baby stores. Children’s furniture is shockingly expensive, especially considering the size. Tiny people require tiny things, but eventually, all too quickly, they outgrow the tiny things. It seemed absurd to spend hundreds of dollars on any one thing that might last a couple of years or even a couple months. I started researching and asking advice from other parents. What we needed versus what we wanted. What was a life saver, and what we could do without. Slowly, items were being crossed off my lists.

We began making room. As my due date approached, we brought out the gear, clothes, furniture, and all things baby related we’d been collecting. I nested. I cleaned, organized, and folded tiny socks. We bought paint.

I began building a nursery.

Building a Nursery

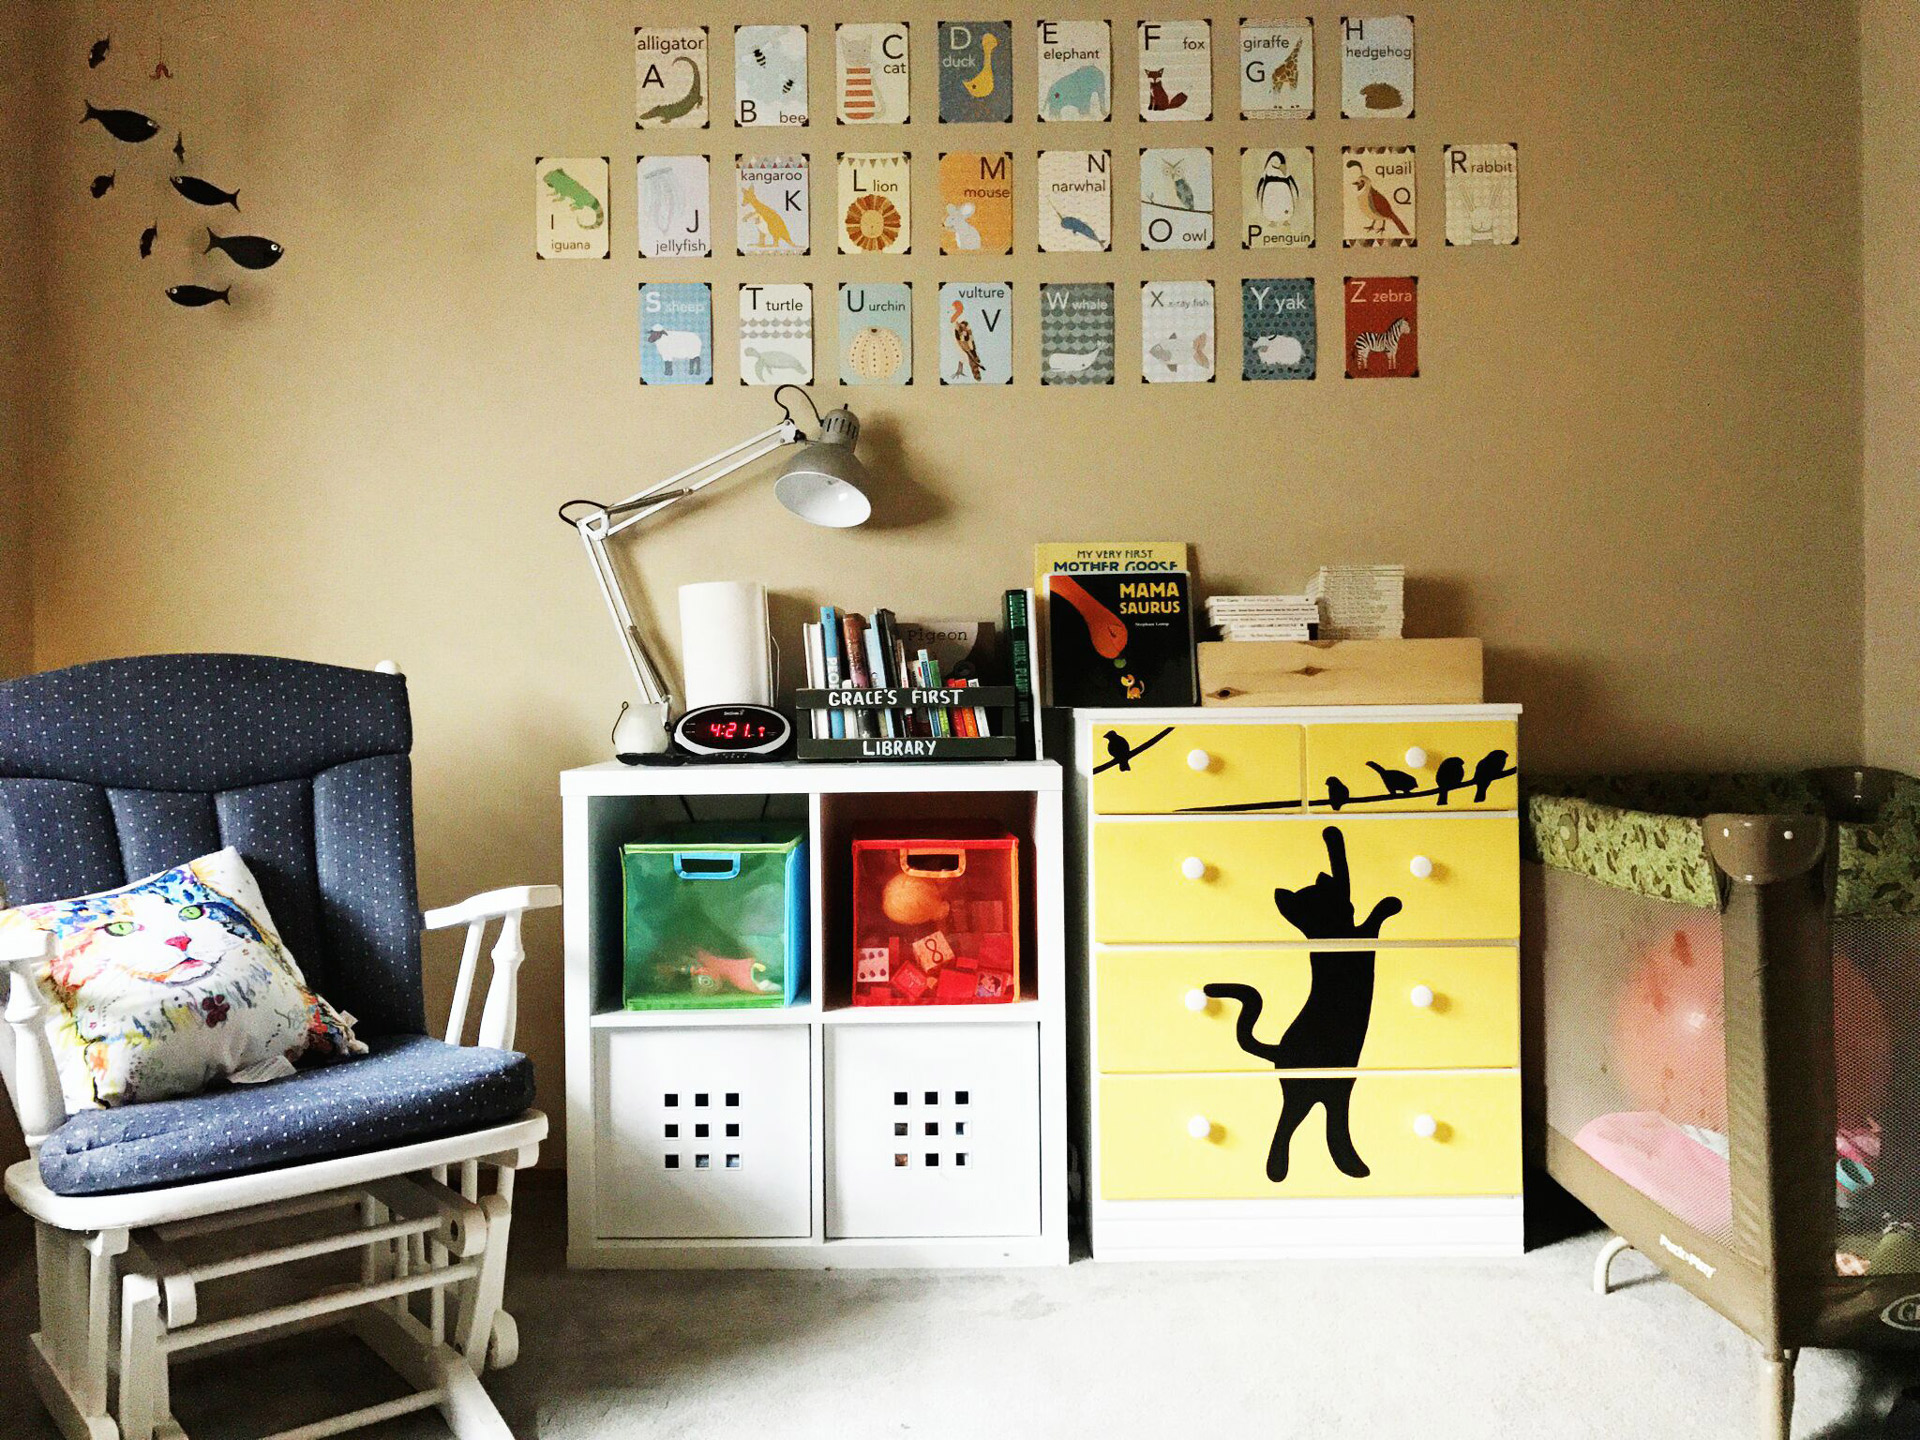
This is what you see when you first walk in the room. The end result came after several rearrangements, adding/taking away accent pieces and furniture. I’m sure it will continue to evolve as my daughter grows.

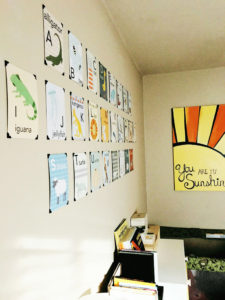
  • One of my favorite parts about the nursery is this Alphabet I found on Etsy. I love the illustrations, and the set only cost $32. It was my first purchase specifically in mind for a baby’s room.
  • A friend gifted the fish mobile in the upper left corner.
  • The square floor shelf was pulled from another room because we decided furniture in the nursery looked better white. The colorful shelves were around $3 each on clearance at IKEA. Actually, the shelf came from IKEA, too. We super love IKEA.
  • A friend gifted The Pack ’n Play because her little ones grew too old. We’ve yet to use it for anything other than storage, which is a nice dual purpose. The room is a small space, 10 x 10 feet, so it’s nice to quickly pull her tummy time mat off the floor and out of the way. When I’m carrying around a crying baby, I don’t want to trip on “stuff.”

The Dresser:

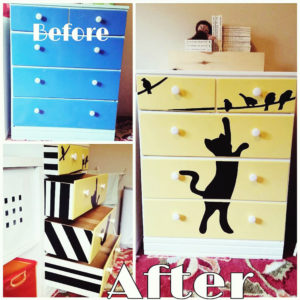
Building a NurseryI saved on cost by buying used and fixing up. This is the before/after of the dresser I bought on craigslist for $40. I only have this photo from my Instagram of the “original” blue. It took FOREVER to finish this 3-foot tall dresser. Or felt like forever because I was working in a hot garage at the end of summer while 8 months pregnant. Unfortunately, I never took progress pictures. So I’ll give a description of my work:
  • Sanded down the blue paint (with help from my husband).
  • Painted several coats of white, excepting the back and bottom, and the yellow fronts of the drawers.
  • Painted several coats of the yellow.
  • Taped off the sides of the drawers and painted the black stripes.
  • I found an image online of a cat silhouette, then birds, and I drew onto the dresser. Full disclosure, I just copied a cat image from Google because it’s not like I’m trying to sell this. Then, painted in the black.
  • The knobs were a dollar each from Home Depot.

When I put the shelves back in order, the two smallest with birds didn’t fit. After a week of working on this, usually in a couple 2-3 hour blocks each day, I thought I might die. I cried a lot. After a small breakdown, I swapped drawers, and tada—they fit! Good enough. I spent so much painstaking time getting everything just right during two days of touch-ups using paint dipped q-tips, that I was done. Other than that tiny mistake, I really love it!

Building a Nursery: It’s all in the details.

Building a NurseryIn the photo on the left, I fixed the alphabet to the wall with adhesive photo corners from a local craft store. They didn’t stay stuck, though. After a couple of days, the cards began falling off. So, I got some sticky tac, and they’ve been up without issue since. I really like the finished look of the photo corners, which saved on cost. It gives the illusion of framing, without the expense of actually framing.  

 Building a NurseryTo the right, the 3×3 feet “you are my sunshine” painting. I used the paint we’d purchased for the baby furniture, plus a little orange I found in the garage. The leftover plywood came from my husband building our platform bed. Upcycling is a great way to stay within a budget!

                                                                                     ***

                                       Building a Nursery                 Building a Nursery

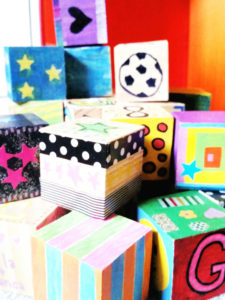
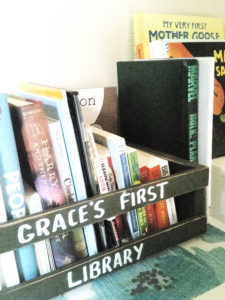
The handmade blocks and “Grace’s First Library” are two aspects of the room which came out of our baby shower; therefore costing us nothing. Instead of decorating onesies, I wanted something my daughter could get use out of years down the road. We set up a station with crafts and paint, and guests designed these special toys just for her.

On the shower invitation, I asked that each person brings their favorite children’s book to start her collection. We now have over 40 books, and she’s 5 months old.

Rocking Chair Project:

Building a Nursery

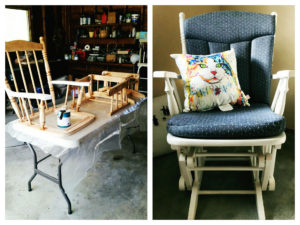
Here, I again did not take progress pictures. I didn’t expect to be sharing any of this with the public, so it never crossed my mind. The chair cost $12 at a local Habitat for Humanity store. We’d been searching for months, so when my husband showed up with that sweet deal, he found me elated. Until I realized he brought me another painting project. I love how it turned out, though, so we both did a good job.

  • My husband took apart the chair and helped me sand. Sanding sucks, even without a huge belly.
  • I painted 3 coats, and it was all tedious. If you look really close, which please don’t, you can see where I got tired of painting and got sloppy toward the bottom. Whatever, it looks way better than the original brown, right?
  • I purchased the cat pillow a couple years ago, and now it fits perfectly with the unintentional animal theme.

The Closet

Building a Nursery

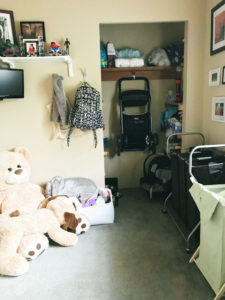
This is the back wall of our nursery. A closet is not particularly eye-catching, but this shows how we utilized room in the small space. We spent a lot of time organizing. Everything has a place, and we do our best to put things where they belong. This is a huge help in keeping the room decluttered.

  • Her diaper bag and stroller hang on designated hooks, which makes it easy to always put them away after each use. Less clutter for the ground.
  • We took the door off the closet to make the area feel more open.
  • Shelves are great for decorating and storage. Above the tiny TV, we have a little family photo section. Plus The Hulk piggy banks from when my husband was a kid. Passing down = cost saving. Inside the closet, each shelf contains similarly themed items (work out gear: yoga mat/hand weights, canned cat food/treats, breastpump/accessories).
  • To the right we have our laundry baskets, both purchased on clearance. The larger one for the adults, the smaller for our daughter.  Fabric makes them look a little fancier than plastic, and since they are exposed and easily accessed, instead of crammed in a closet, we keep dirty clothes picked up. Again, less clutter in a small space is key to having the room feel big. 
  • The stuffed animal corner cost us $20. My husband found another sweet deal on the large bear, and the rest were free from the local “Buy Nothing” Facebook group, or gifts.

Building a Nursery
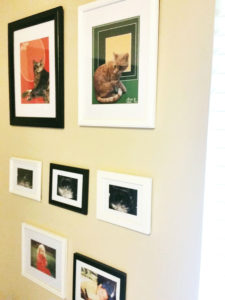
This is another example of how I saved on cost while building a nursery. I bought these picture frames at Goodwill and painted them black and white (again, using what we already have). I drew digital pictures of our cats, framed the first ultrasound pictures of our daughter, and printed a couple photos from when my husband and I were kids (our favorite of each other). One of a kind, personal artwork makes the room unique, and this section cost less than $10!

The moral of my story:

It’s relatively easy to spend a lot of money building a nursery. If done right, it can be incredibly easy to save. Everything pictured that we bought specifically for the nursery, totaled under $200. You’ll notice no crib is in the room. We decided to co-sleep with a family bed, so our daughter sleeps with us. Good thing we own a king sized bed. I convinced my husband we don’t need a changing table. Instead, we change her on the bed, which is more convenient for us anyway.

  • Bringing what you can off the floor is going to help save space when building a nursery.
  • Use your own crafty ways to decorate the nursery (or any room) to save on cost.
  • Upcycle.
  • Check out local groups online.
  • Browse craigslist every day.
  • Find a friend, like I did, whose kids are slightly older than yours, and take all their hand-me-downs.

We’ve paid for almost nothing full price while prepping for baby and building a nursery. Except for socks. We totally bought socks.