Browsing Category

Lifestyle

DIY Lifestyle

Envelope Style Pillow DIY

Envelope Style Pillow DIY

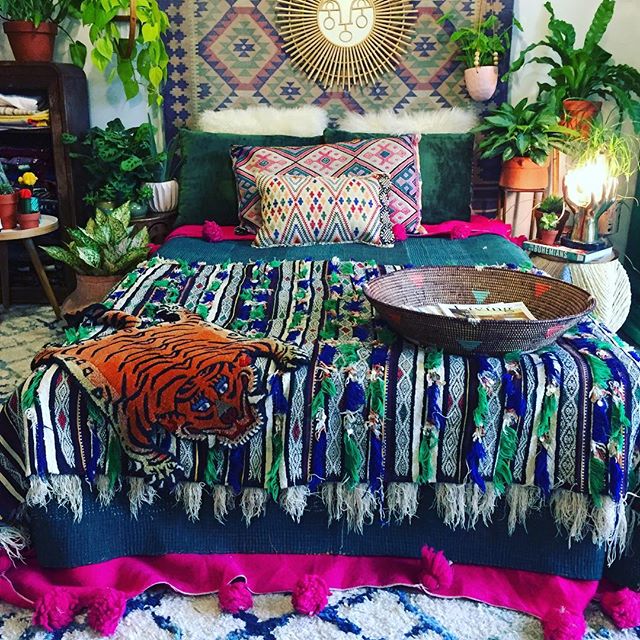
In our home, we have a problem that my husband affectionately calls “pillow hell.” I do purchase an excessive amount of throw pillows…but there’s a method to my madness! When it comes to decorating, like many people, I like a strong neutral base. Having a gray couch instead of a green one allows me to use pillows and various other decor to set the tone. When I get sick of it, I can just swap it out for what’s in style or season. Which brings me to my inspiration for doing this Envelope Style Pillow DIY!

The other day I saw a tutorial for a Cactus Pillow Outline DIY on A Beautiful Mess and a lightbulb went off. I’d been going about this all wrong! Instead of being a weirdo pillow hoarder I can just make different pillow covers to switch out, saving space and lots of cash!

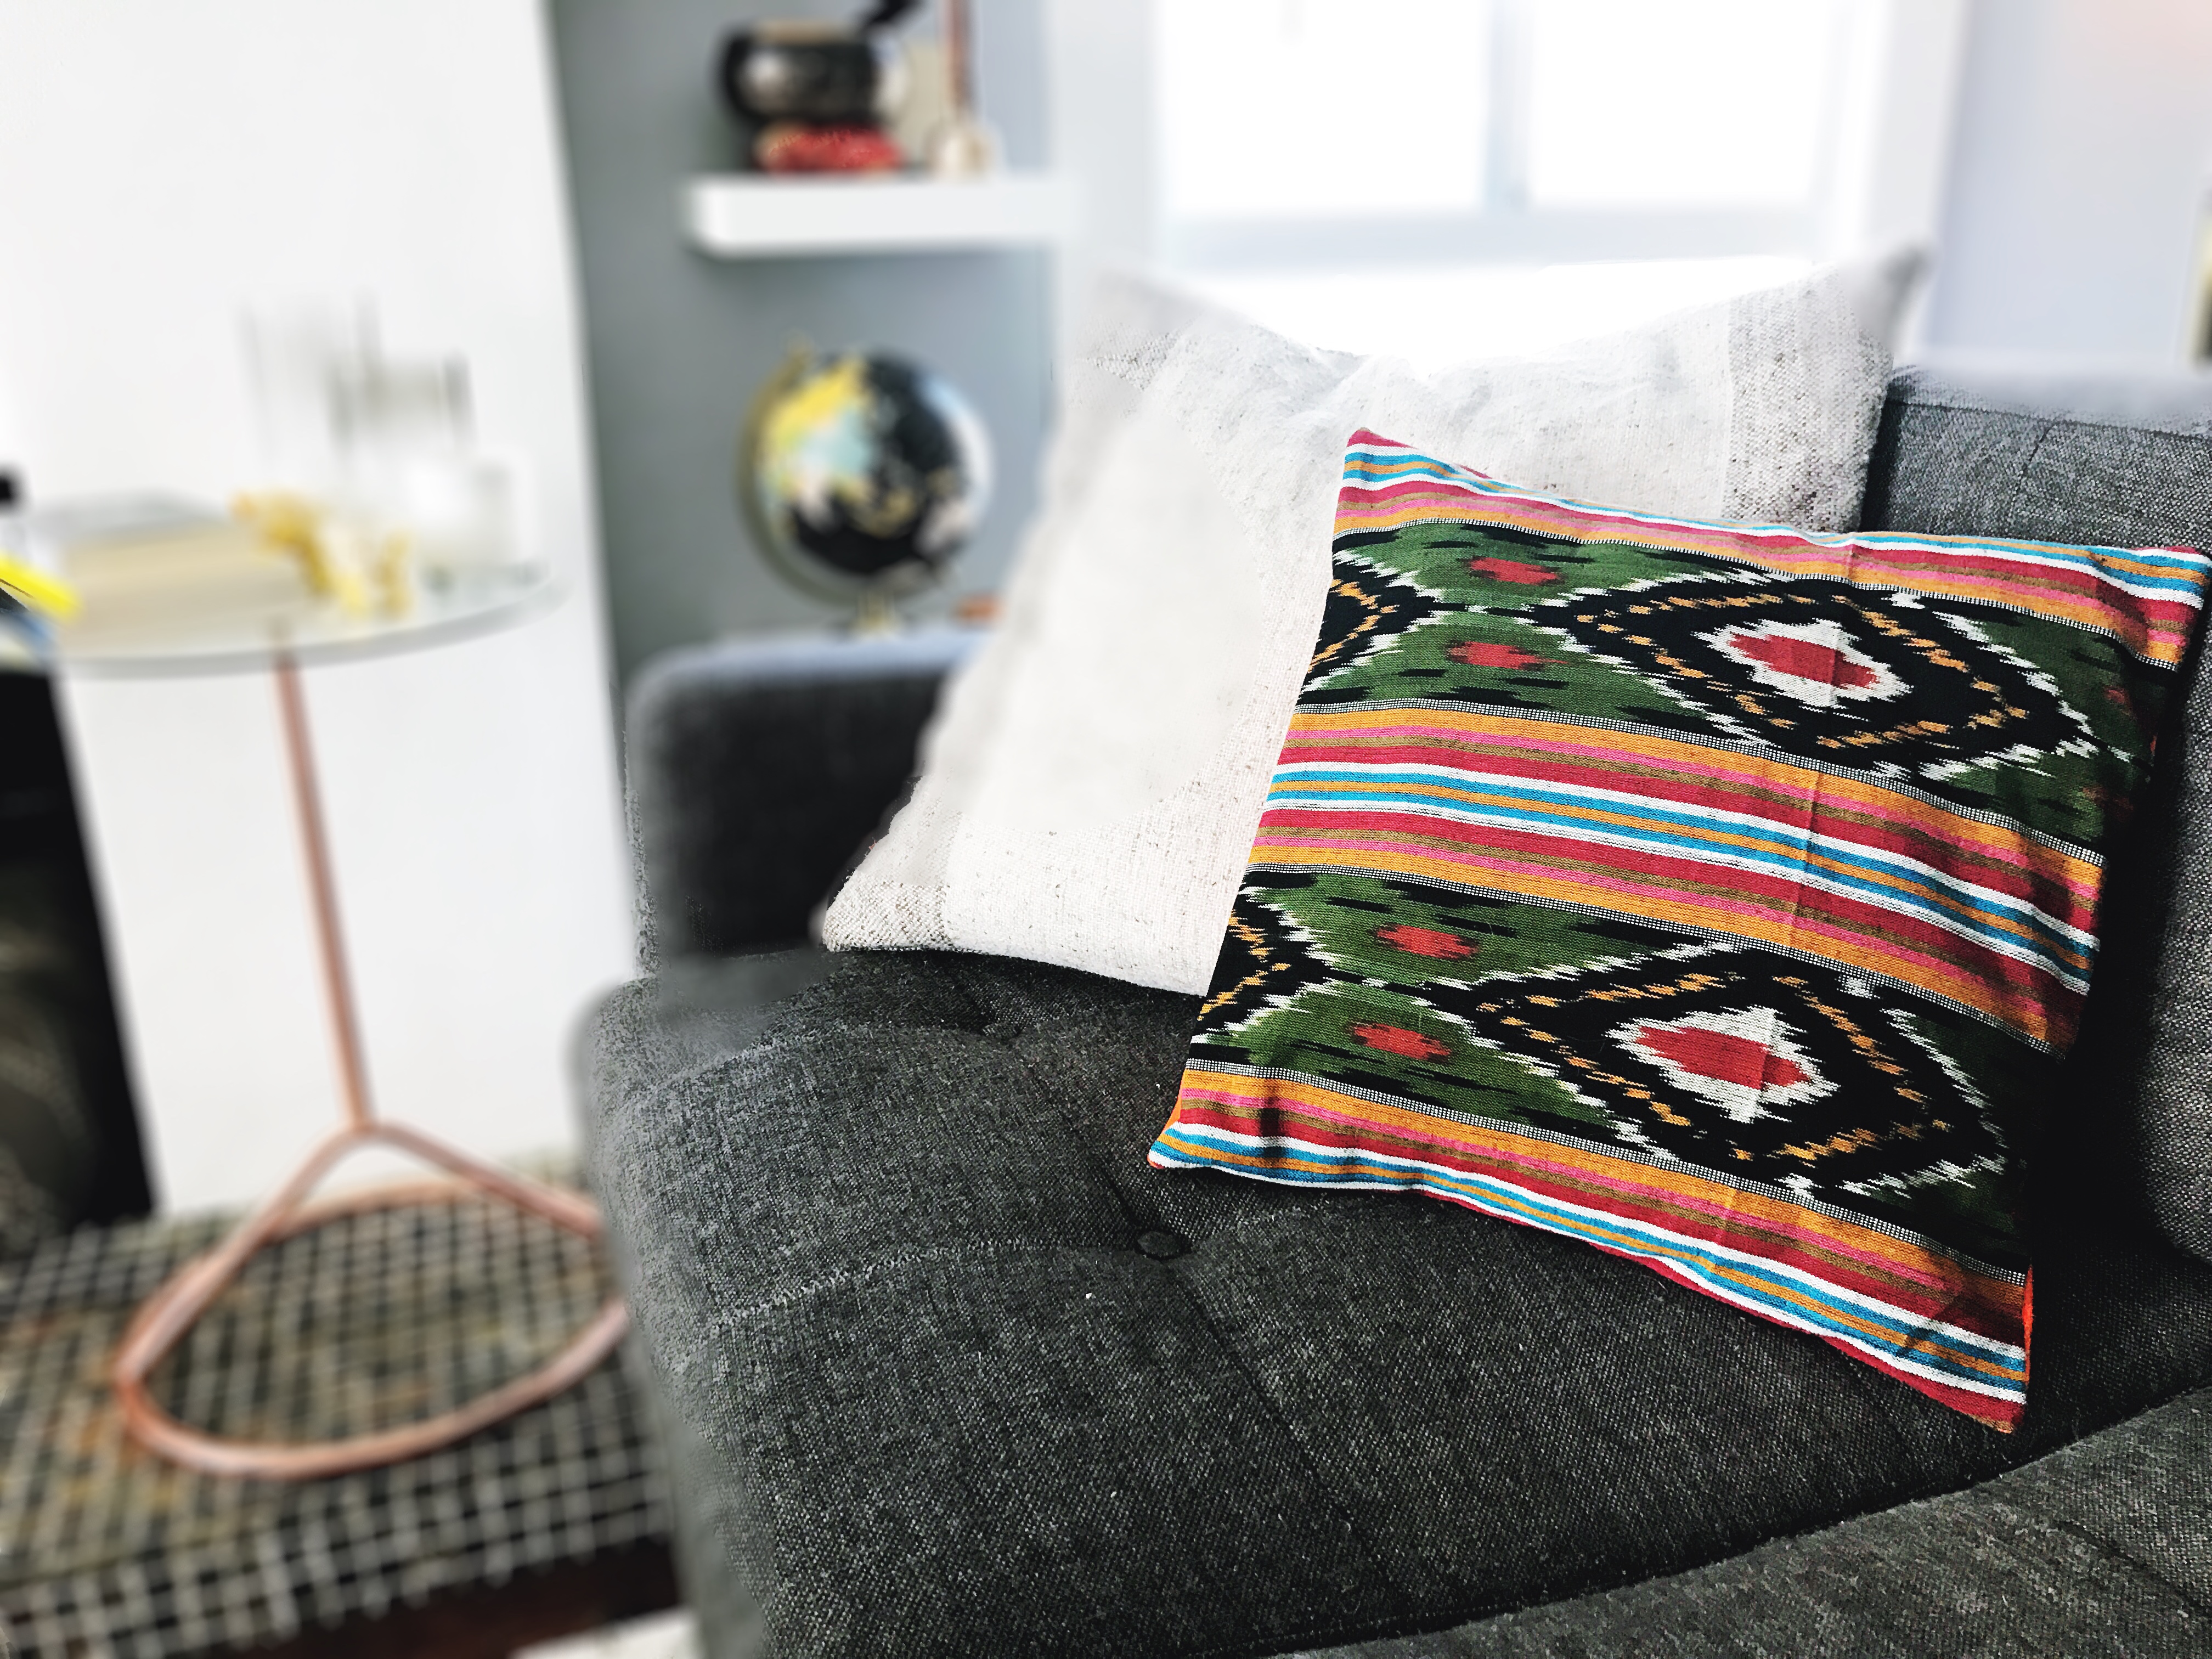
Lucky for me, I’m also a fabric hoarder. Whenever I’m at a fabric store downtown like Michael Levine, I always pick up a yard of a few Ikats and styles that speak to me. These types of fabric can get really pricey (like $18 a yard, that’s pricey, right?) so I love the option to pick up a little bit to use as a chair cushion cover, purse, or as part of a handmade gift. My textile obsession definitely paid off when I went to create my Envelope Style Pillow DIY. I had quite a few Ikats and other fabrics to choose from. In the end, I chose a beautiful earth and jewel toned Ikat and a bright orange cotton duck for my Envelope Style Pillow DIY.

I already had a pillow (as evidenced from my pillow hoarding), this one came with a comforter set from Ross that I’d just been clinging on to. It’s been traveling aimlessly around our bedroom floor forever and I thought it deserved a better life.

Let’s go, Envelope Style Pillow DIY!

You’ll need:

  • A pillow you hate
  • Fabric, I used two kinds one for the front, one for the back
  • Scissors
  • Pins
  • A sewing machine (or the patience for hand sewing)
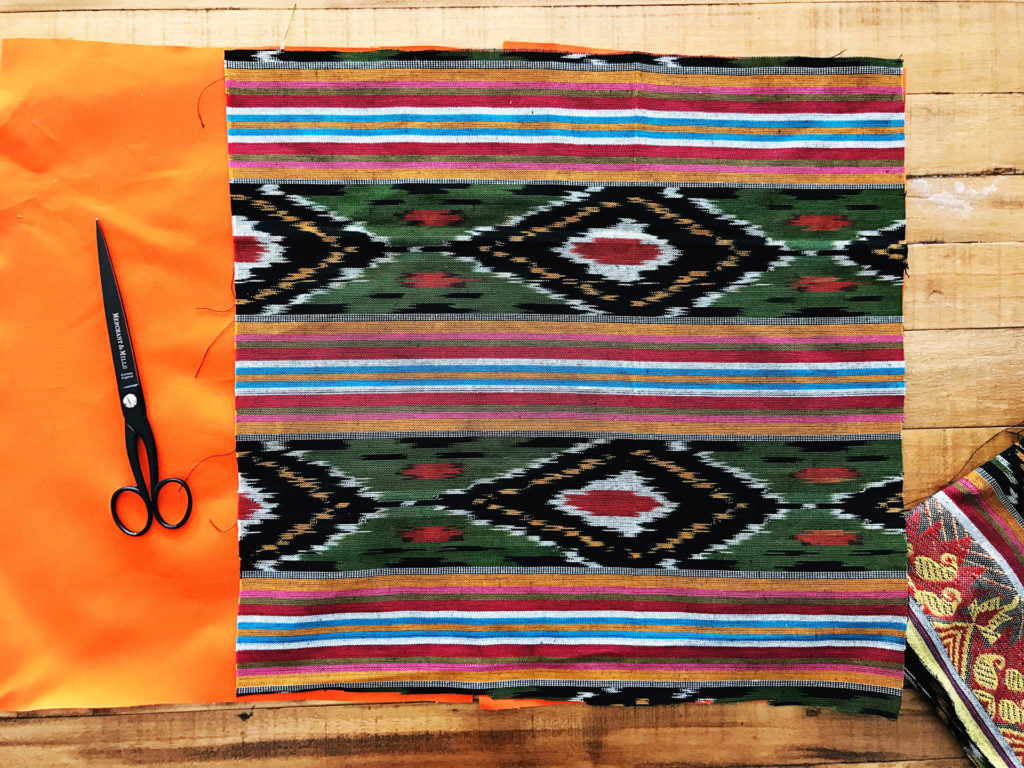
Step 1:

Mark the fabric for the back/ envelope side of the pillow for cutting. Gave an extra 1″ on each side of the pillow to allow for the height/ stuffing. I just eyed it, it isn’t rocket science.

I used a white fabric pencil to mark my cuts.
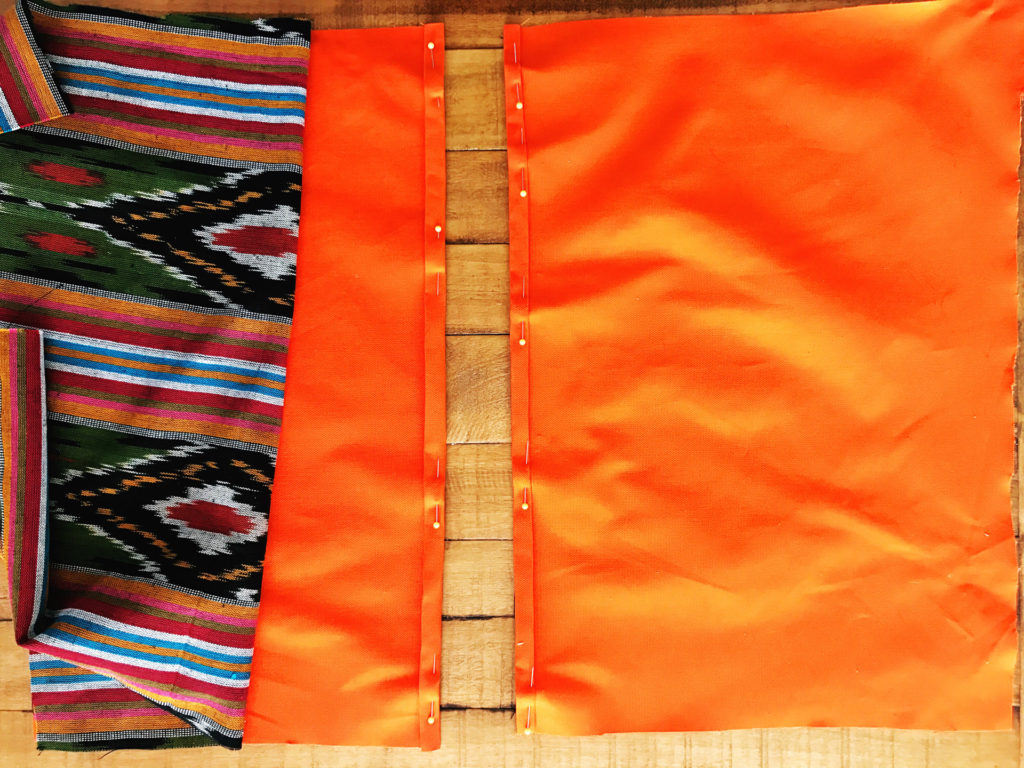
Step 2:

Once you cut out the fabric square for the back, cut it in half just a little off center.

Step 3:

Repeat the process of marking and cutting the front piece of fabric. You can use the back piece as a guide for the height, but the width will be uniform (since you won’t be doing an fabric overlap in front).

Envelope Style Pillow DIY

Step 4:

You can see that the front piece is less wide than the back piece.

Envelope Style Pillow DIY

Step 5:

Pin your back pieces for a hem where they’ll “meet” (if you’re doing a hem).
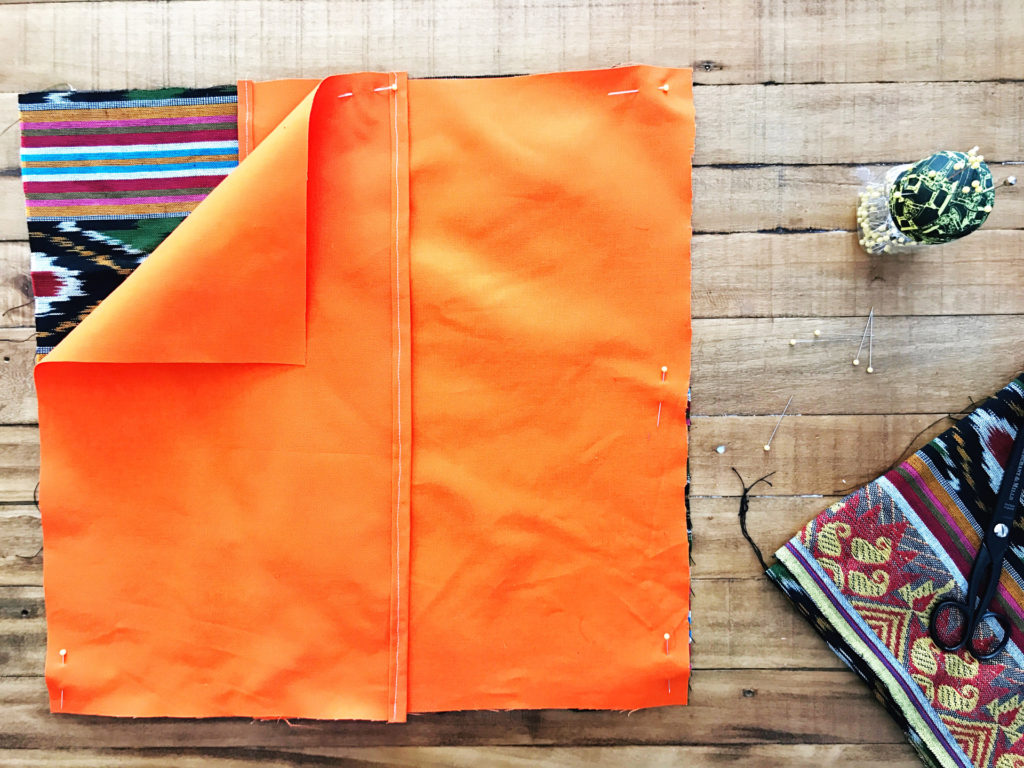
Envelope Style Pillow DIY

Step 6:

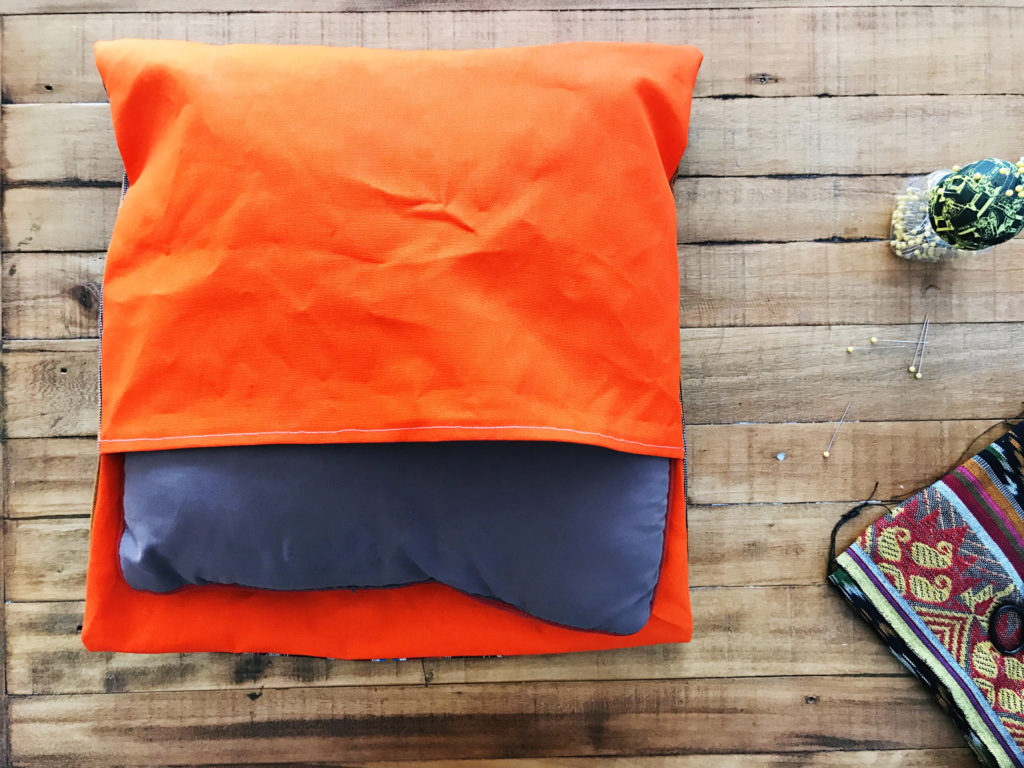
Sew your hem. You can match the thread color if you’re OCD, but I don’t care and my husband won’t notice, so I just used what was in my machine. Pin the fabrics with the right side of the fabrics facing each other and with the fabric for the back of your pillow overlapped as shown. Sew around the exterior border with a 1/2″ seam allowance.
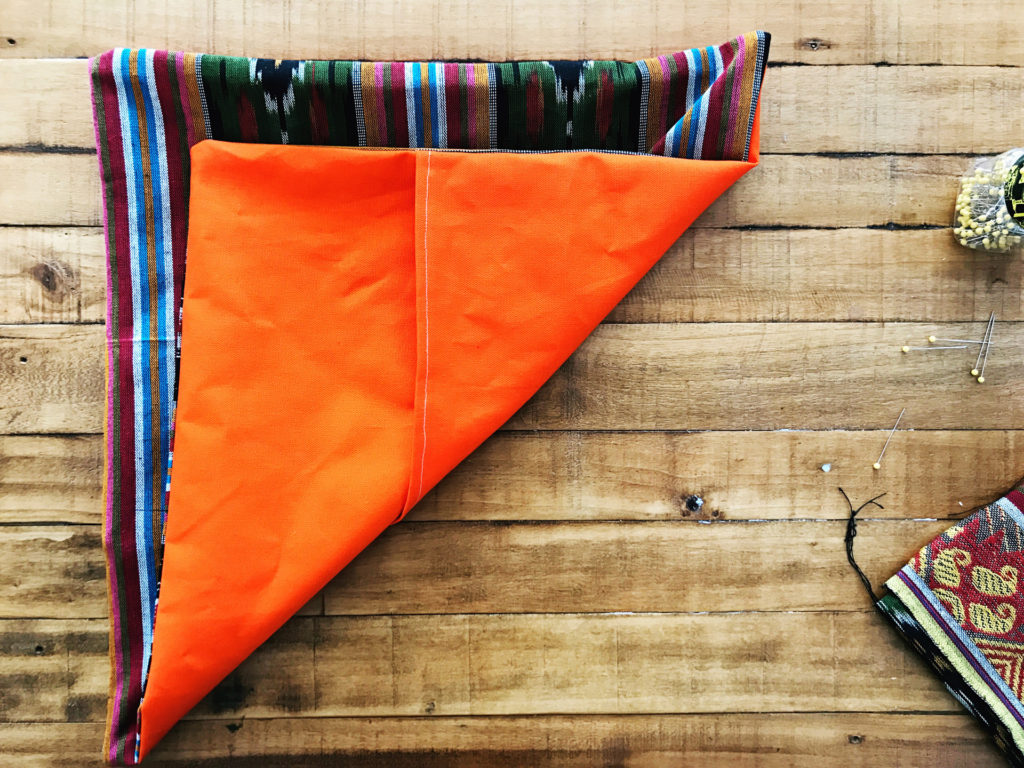
Envelope Style Pillow DIY

Step 7:

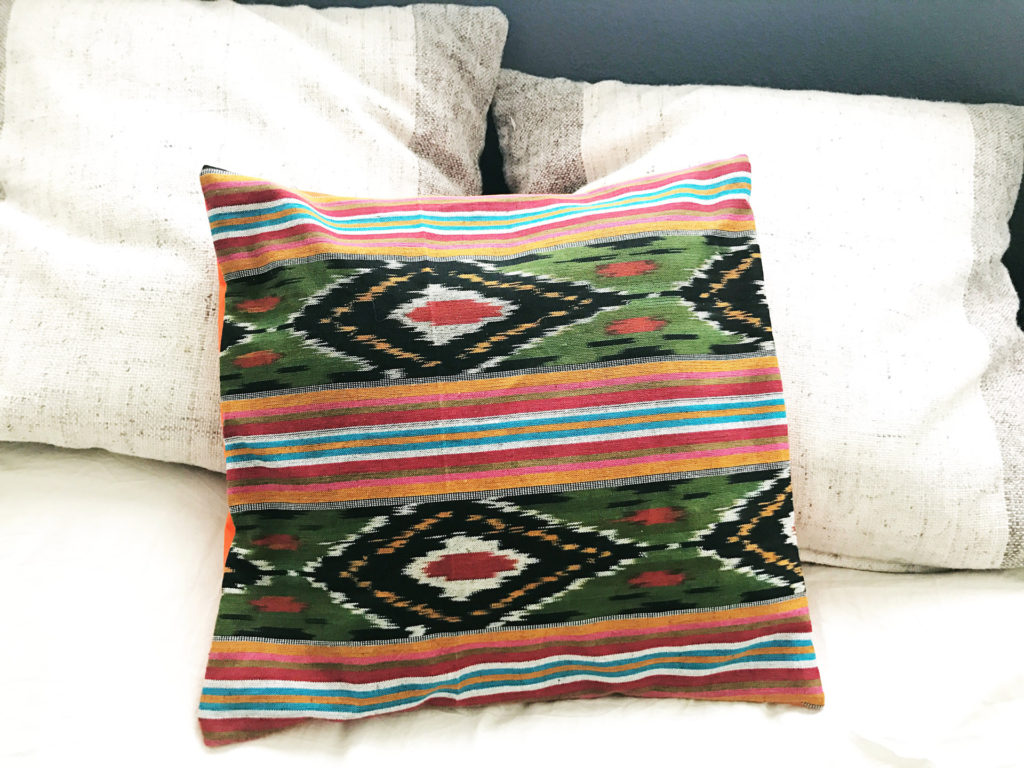
Look, you completed my Envelope Style Pillow DIY!

Envelope Style Pillow DIY

Step 8:

Stuff your pillow in your new Envelope Style Pillow Cover.

Envelope Style Pillow DIY


Envelope Style Pillow DIY


Let me know in the comments if you liked this Envelope Style Pillow DIY tutorial!


Attempts DIY Lifestyle

DIY Rope Dog Toy Basket

DIY Rope Dog Toy Basket

I’ve seen concepts for DIY Rope Baskets a lot—on Pinterest and various blogs—with people using laundry baskets (the standard, dollar store plastic ones with holes). These baskets are perfect for beside a sofa or living room setting to have blankets and other items of comfort on hand. I have my blankets stored elsewhere and what I really needed was something cute to store my dog’s toys in. So I came up with an idea to do a DIY Rope Dog Toy Basket.

I had a leftover IKEA wastebasket—sans holes— so I thought I’d give my version a try. My wastebasket is much smaller than a laundry basket.  I had a lot of extra sisal rope from Home Depot, in two different sizes that had been sitting outside in the rain for almost a year (eek, I know). So I finally freed it from its wet prison and draped it over my porch railing to air dry a bit. Once it was mostly dry, I threw it into the dryer for 30 minutes to finish the job. My original vision was to use the thicker kind of sisal on the bottom and try to taper up into the thinner twine. Sounded easy enough!

In the end, for my DIY Rope Dog Toy Basket I chose to begin with the thicker sisal, braid in the thinner sisal halfway up for three rows, and end with just the small sisal. I’m super happy with the result, and so is Tallulah (she’s the cute one in black).

DIY Rope Dog Toy Basket

Step One: Collect Your Supplies
  • 10 ft. of natural sisal rope
  • Wastebasket
  • Cloth/ textile of your choice
  • Hot glue gun & Glue
  • Scissors

DIY Rope Dog Toy Basket

Step Two: Cut your fabric

For this step, lay the fabric inside the wastebasket so that it is touching the bottom and all the sides. This way, if something heavy is put in, the weight won’t tear the fabric or make the hot-glue come undone.

DIY Rope Dog Toy Basket


Step Three: Cut off the fabric that’s overlapping the lip of the wastebasket on the outside.

Give yourself about an inch to overlap. Once you’ve cut around the outside, you can begin to hot glue the fabric so it overlaps the lip of the wastebasket by about 1″. I wasn’t bunching my fabric enough when I started gluing, so I ended up with a bunch of fabric spilling out when I reached the end. However, I liked the effect and decided to keep it! The best part about DIY is that sometimes your mistakes can inspire you 🙂

DIY Rope Dog Toy Basket

Step Four: Begin gluing the sisal rope, starting at the base.

Once you’ve secured the fabric to the outside lip of the wastebasket, you can start to glue your sisal on. I used all the glue pictured (about 12-13 sticks), so have a lot on hand if you need it. Apply the glue directly to the basket and pressed the sisal into it for ten seconds to dry. Glue about 5″ at a time.

DIY Rope Dog Toy Basket

Step Five: Continue

Now you’ll basically continue gluing and wrapping the sisal all the way around until you’re finished. If you want to do a braided effect start it once you reach the second tier/ halfway point. Begin to twist in the thinner sisal. Do this for a few rows. Then, cut the thick sisal rope and continue in a straight line all the way around with the more lightweight sisal. This is the end result and I’m super happy with it. If you’re good at needlepoint or embroidery the excess cloth would be great to add a monogrammed initial or a little heart.

DIY Rope Dog Toy Basket

That’s it! I hope you enjoyed this tutorial for a DIY Rope Dog Toy Basket! Let me know in the comments how it turned out and tag me on Instagram in your creations! I’d love to see <3

Lifestyle Recipe

Banana Mango Breakfast Bowl

banana mango breakfast bowl

My husband is the coolest, most supportive person I know. Furthermore, he happens to be a fiend for tropical flavors. I decided to treat him today by making him a surprise Banana Mango Breakfast Bowl! What better person to appreciate my exceedingly impressive smoothie skills than him 😂 😂 ???

He woke up kind of grumpy and feeling under the weather and I have to say my delicious recipe totally turned his attitude around. How instead of moping around all day we’re going to take a hike to explore a nearby ghost town!

I’ll be bringing my copy of Drawing Down the Moon, by Margot Adler.

I love reading about paganism and how people around the world practice different traditions. Hopefully, my husband stays sated by the Banana Mango Breakfast Bowl so I can enjoy my book in peace!


Banana Mango Breakfast Bowl

Print Recipe
Serves: 1 Cooking Time: 5 minutes

Ingredients

  • 1 frozen banana
  • 1 cup frozen mango
  • 1/4 cup vanilla greek yogurt
  • 1/2 tsp. turmeric
  • 1 tbsp. sweetened shredded coconut
  • 1/2 cup coconut milk
  • Garnish:
  • 2 tbsp. chia seeds
  • 1 tbsp. sweetened shredded coconut
  • 2 strawberries, sliced horizontally

Instructions

1

Blend ingredients

2

Plate beautifully

3

Garnish

4

Serve to significant other

5

Redeem praise and love

Lifestyle

10 Colorful & Inspiring Instagram Accounts To Follow


@designsponge — A staple in home decor and DIY10 Colorful & Inspiring Instagram Accounts To Follow


@apartmenttherapy — Making use of that small space you call home10 Colorful & Inspiring Instagram Accounts To Follow


@thejungalow — For bringing the jungle into your home decor. Plants, succulents, and lots of style10 Colorful & Inspiring Instagram Accounts To Follow


@archiveofaffinities — Graphic and inspirational finds10 Colorful & Inspiring Instagram Accounts To Follow


@acid_free — Amazing collection10 Colorful & Inspiring Instagram Accounts To Follow


@lauracallaghanillustration — Bright, literal, and inspirational illustration10 Colorful & Inspiring Instagram Accounts To Follow


@itsnicethat — A celebration of cool shit10 Colorful & Inspiring Instagram Accounts To Follow


@thehoodwitch — Astrology, spells, affirmations, and badass nails10 Colorful & Inspiring Instagram Accounts To Follow


@design.junkie — Curated for your tribal and bright boho needs10 Colorful & Inspiring Instagram Accounts To Follow


@DISfunkshionmag — Empowering females through bright design10 Colorful & Inspiring Instagram Accounts To Follow